“Omni-Channel Sales module for CRM SYSTEM” Documentation by “Applify Technologies”
“Omni-Channel Sales module for CRM SYSTEM”
Created: 2023-08-05
By: Applify Technologies
Email: crm@applify.com.my
Table of Contents
How to use Omni-Channel Sales module - top
I. How to use Omni-sales POS
- Add product to POS and custom price of product when display on POS.
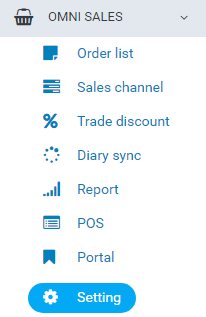
-Click Sales channel in the left menu to go to channel management page.
-Click Setting product.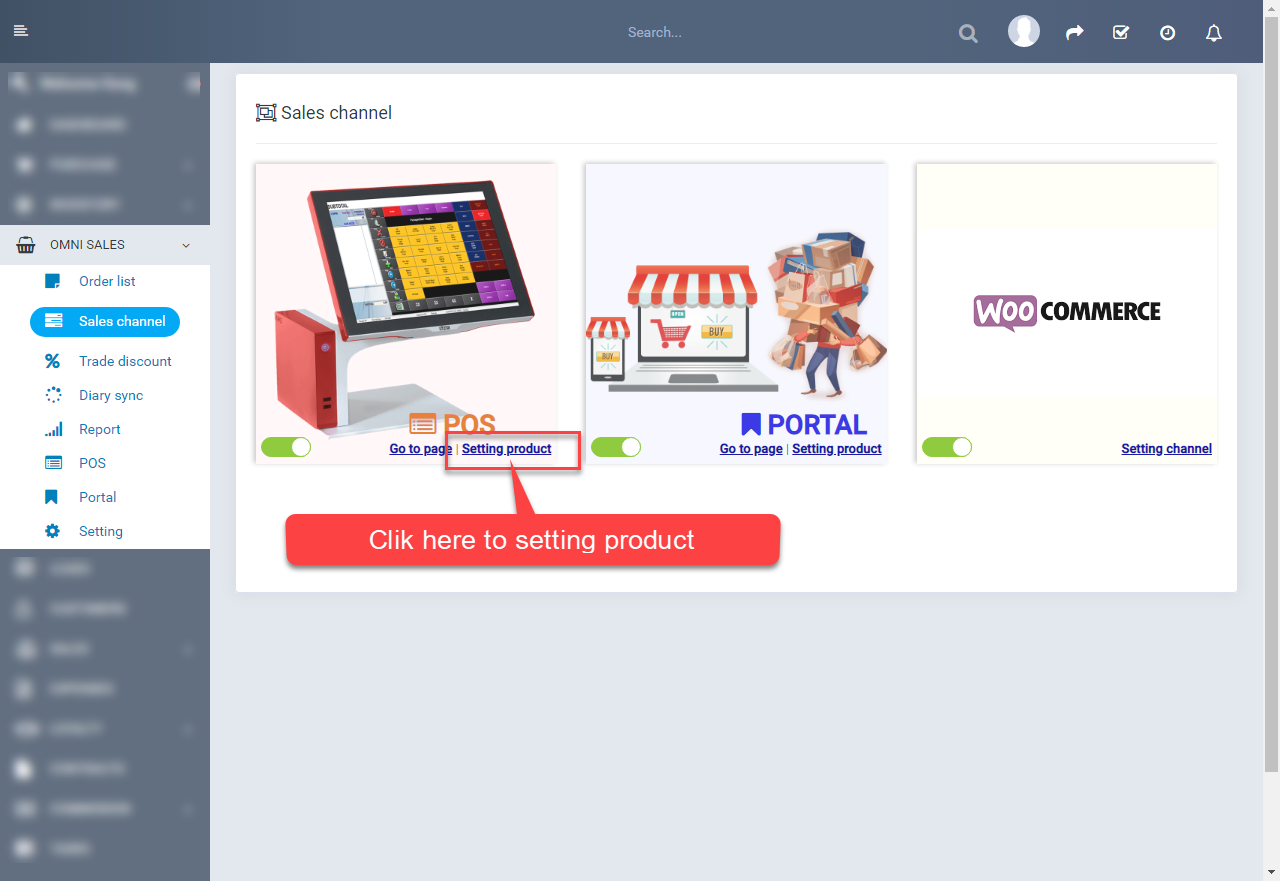
-Click Add button to open add product interface.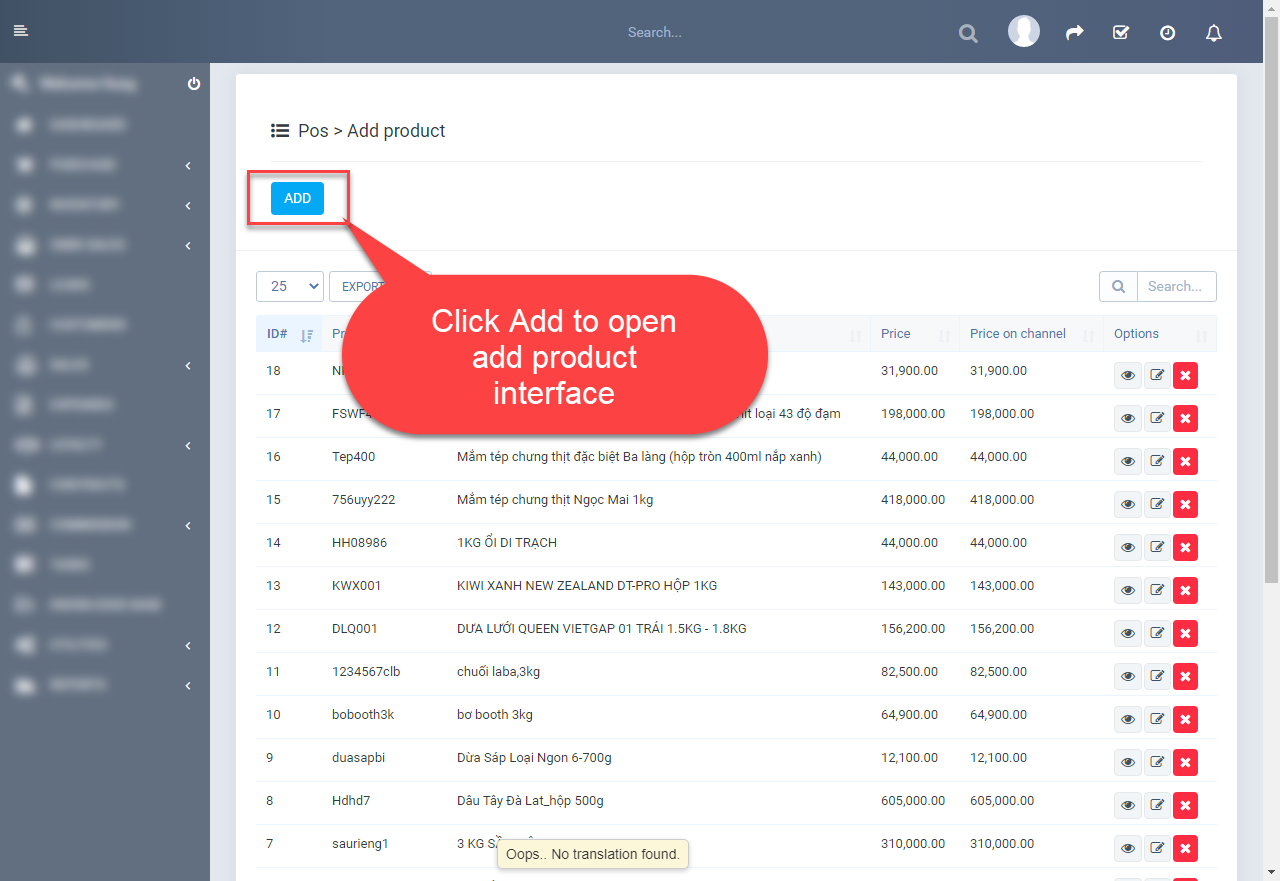
-Select Group product to fillter list product by group. After, select product and click Save button to add product. If not select Group product, default list is all product.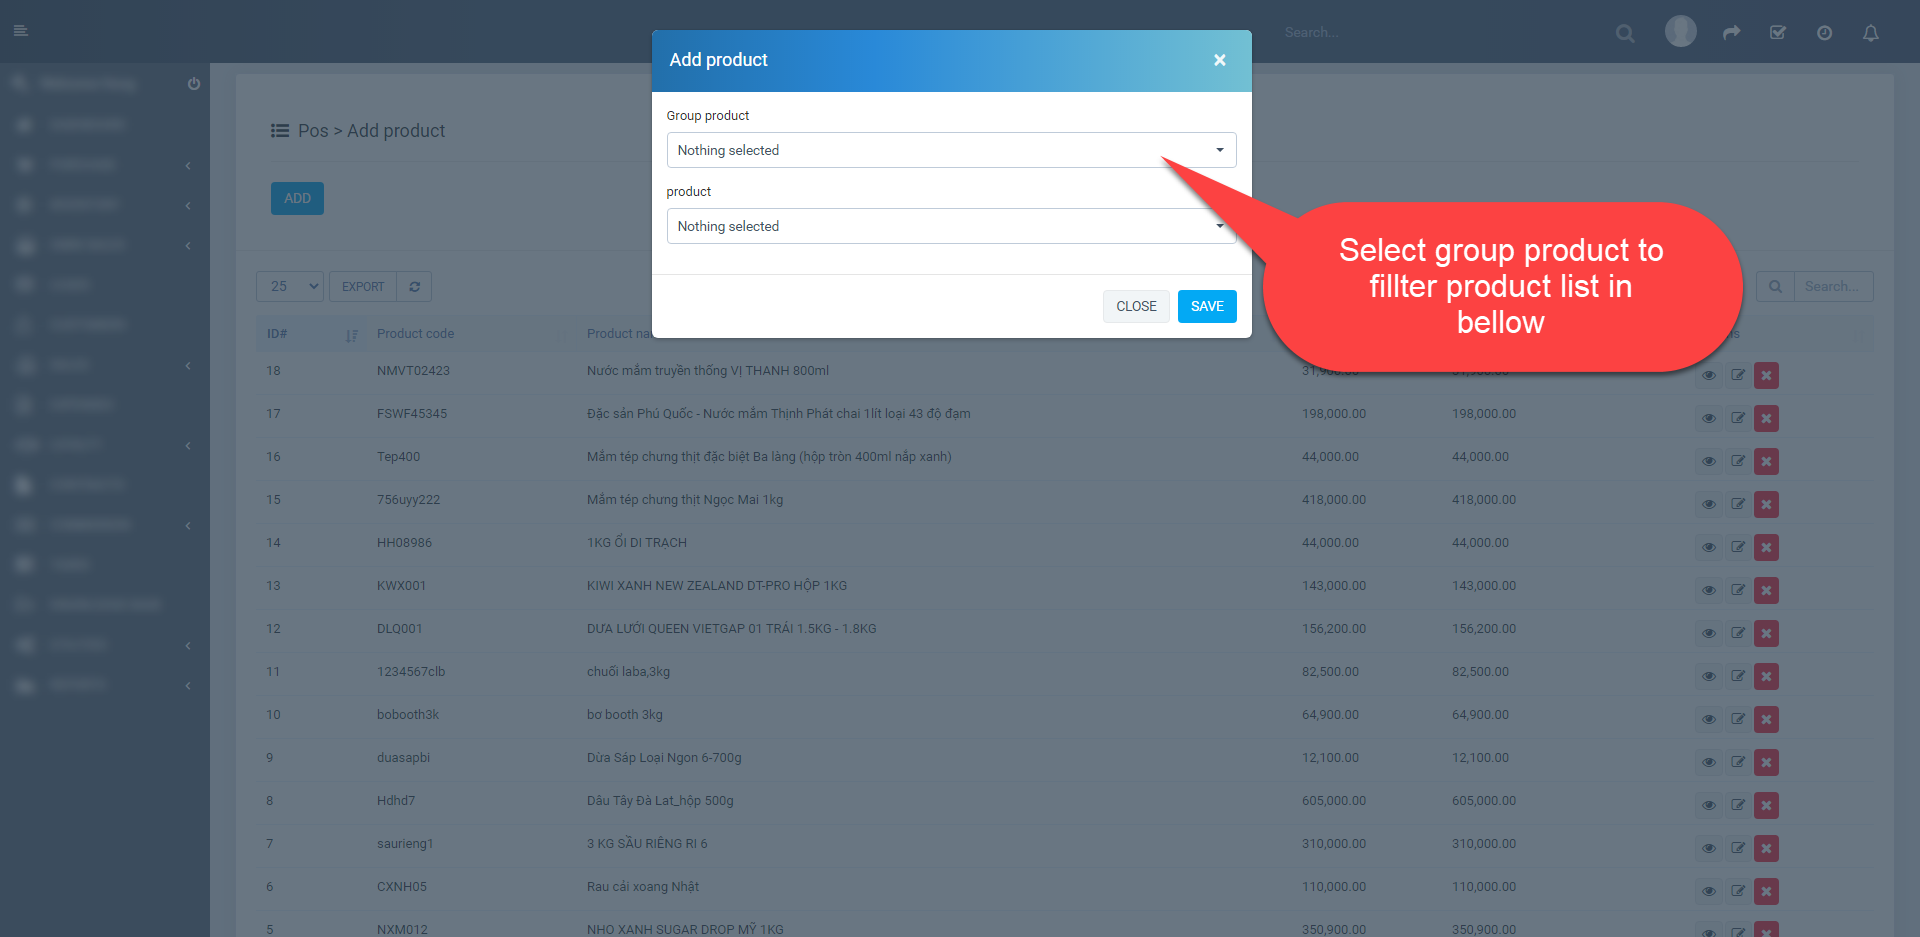
-To change price of product, you click to edit button like in the picture to open edit product interface.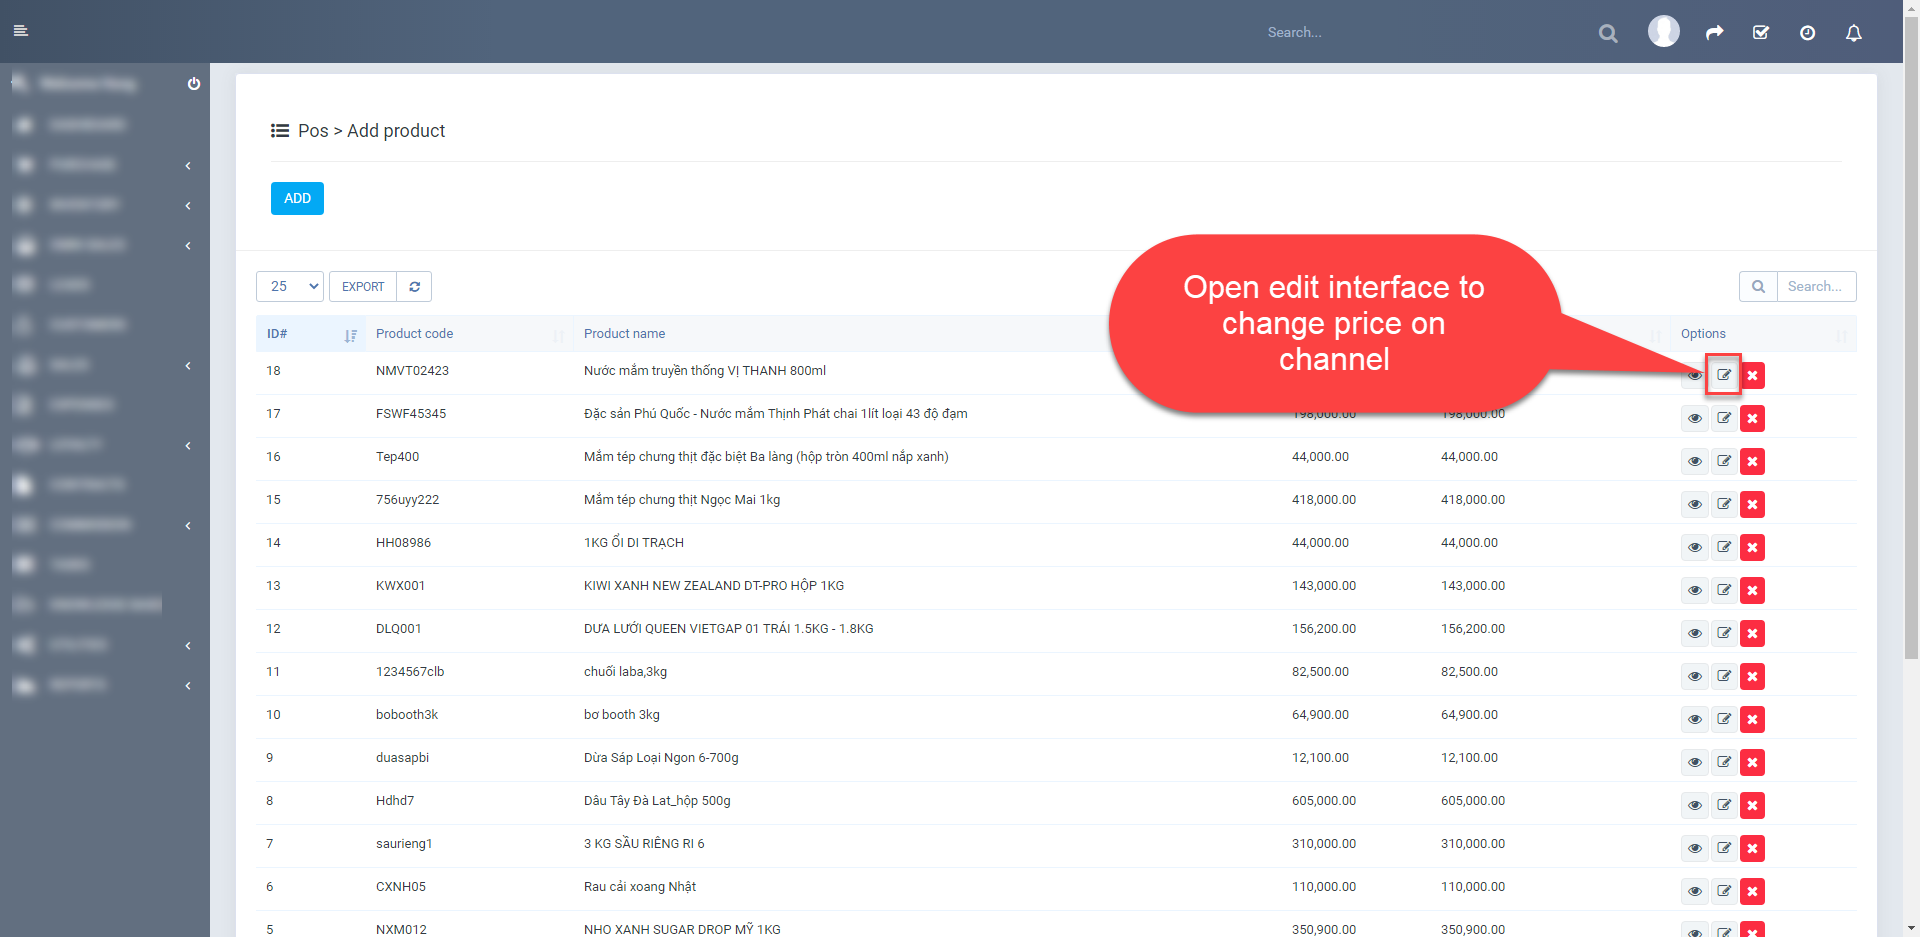
-You can change price of product at Price field and Save to change.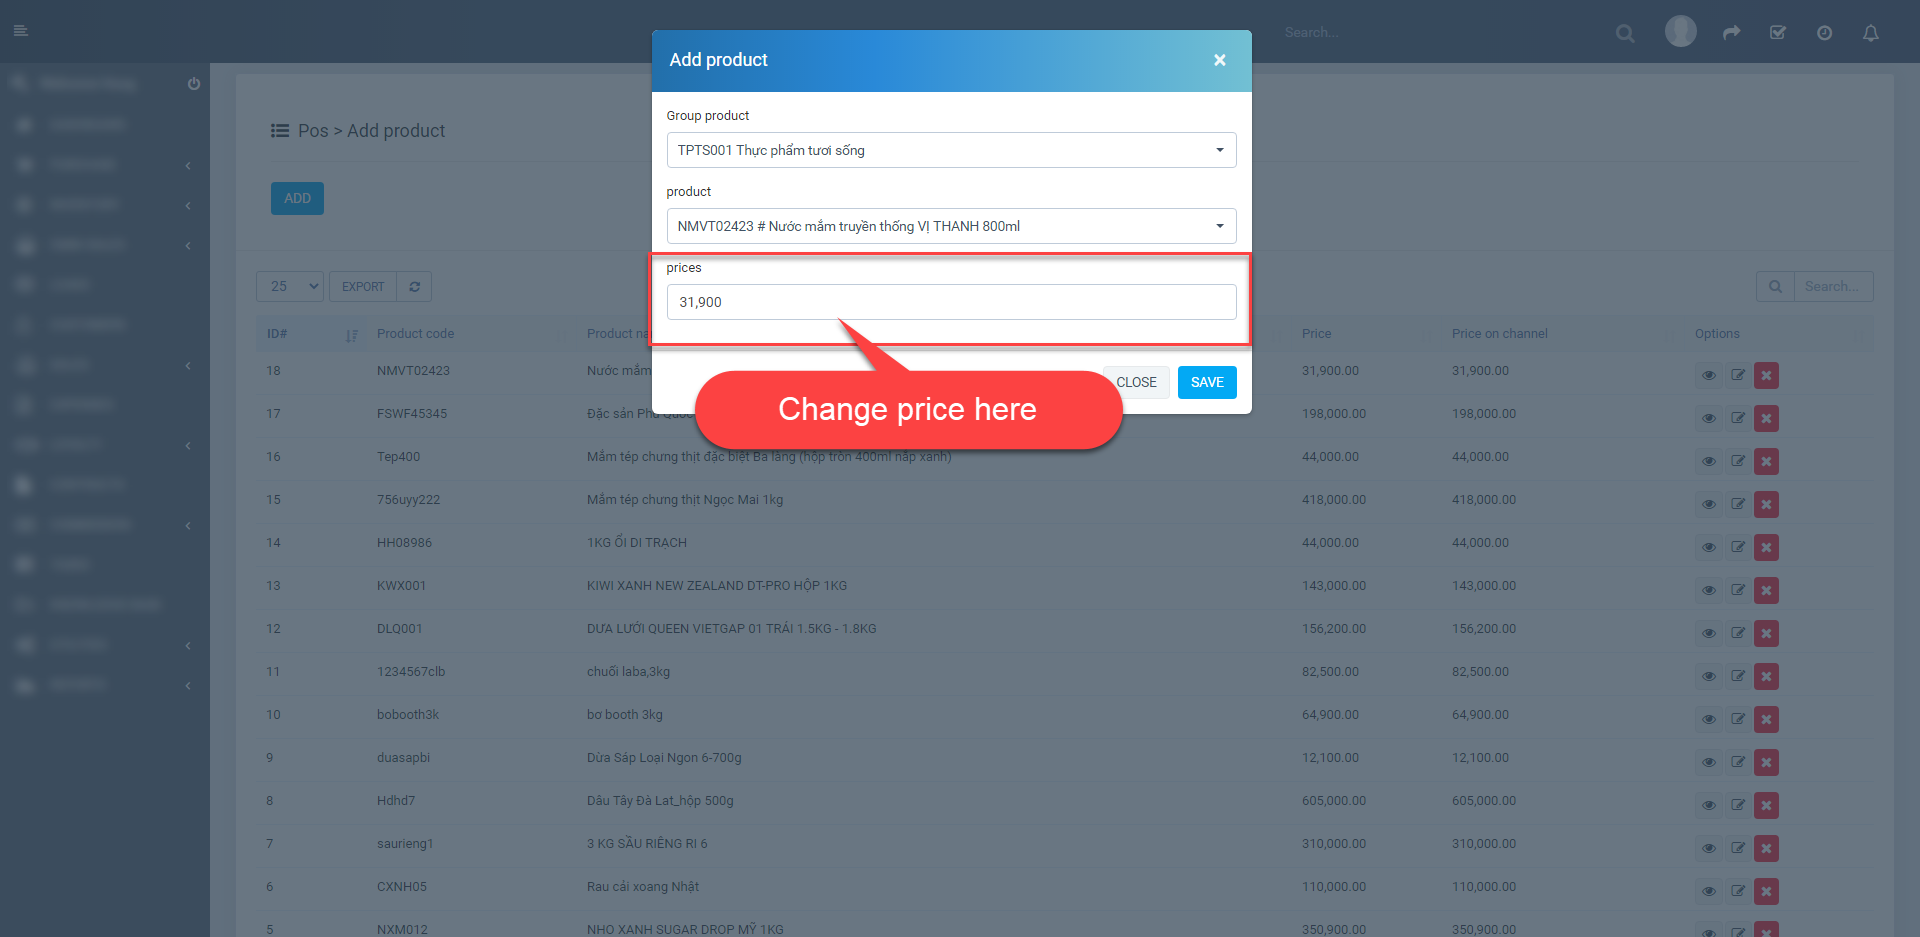
- Order
-Click POS in the left menu to open POS interface.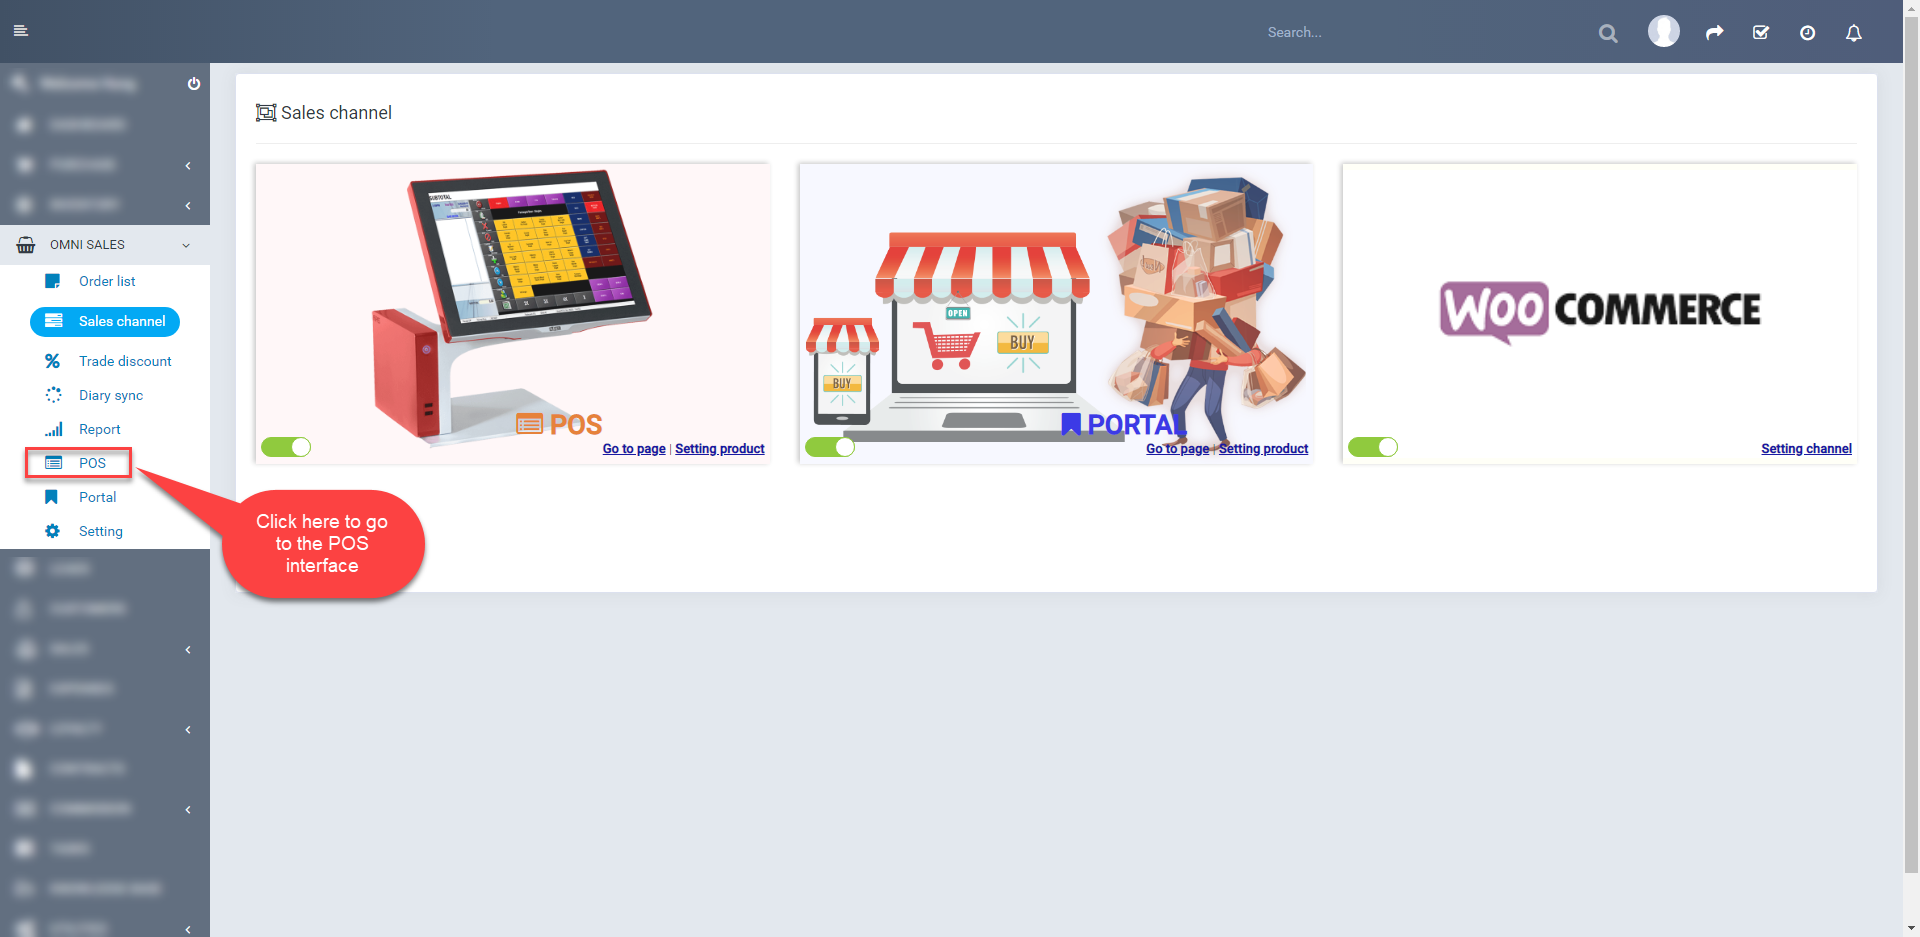
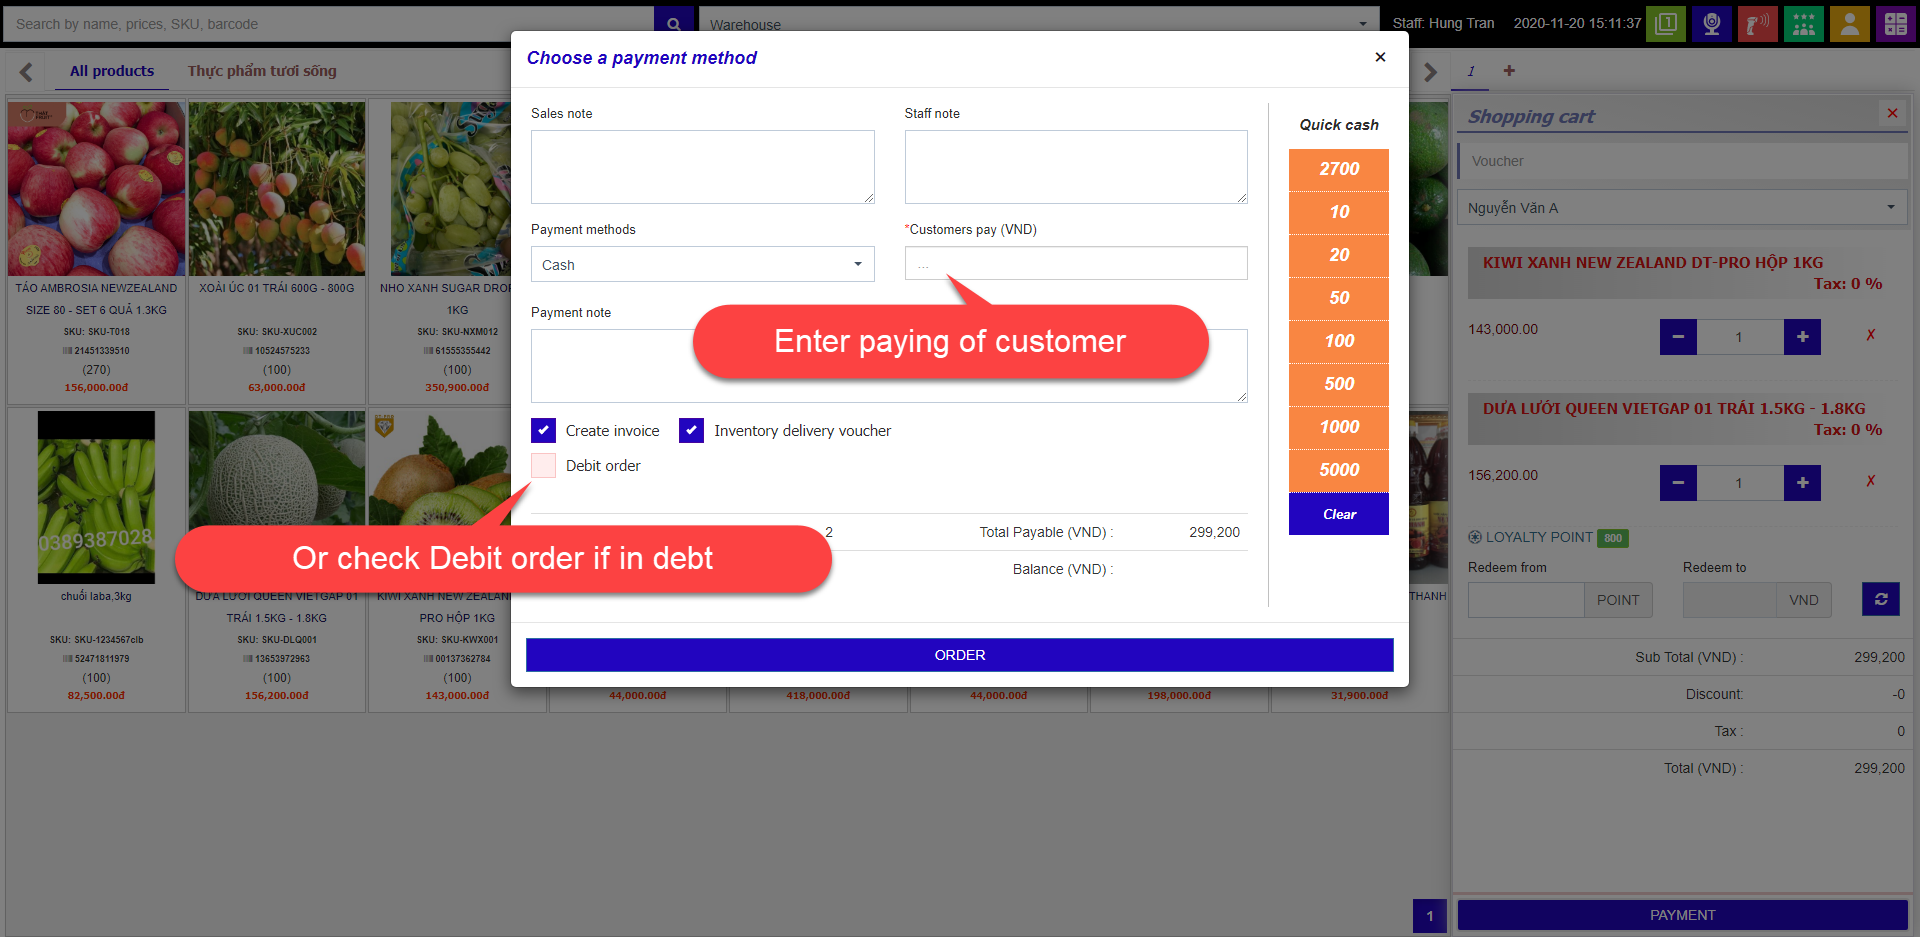
-Here, you choose product, customer and click Payment to open payment interface.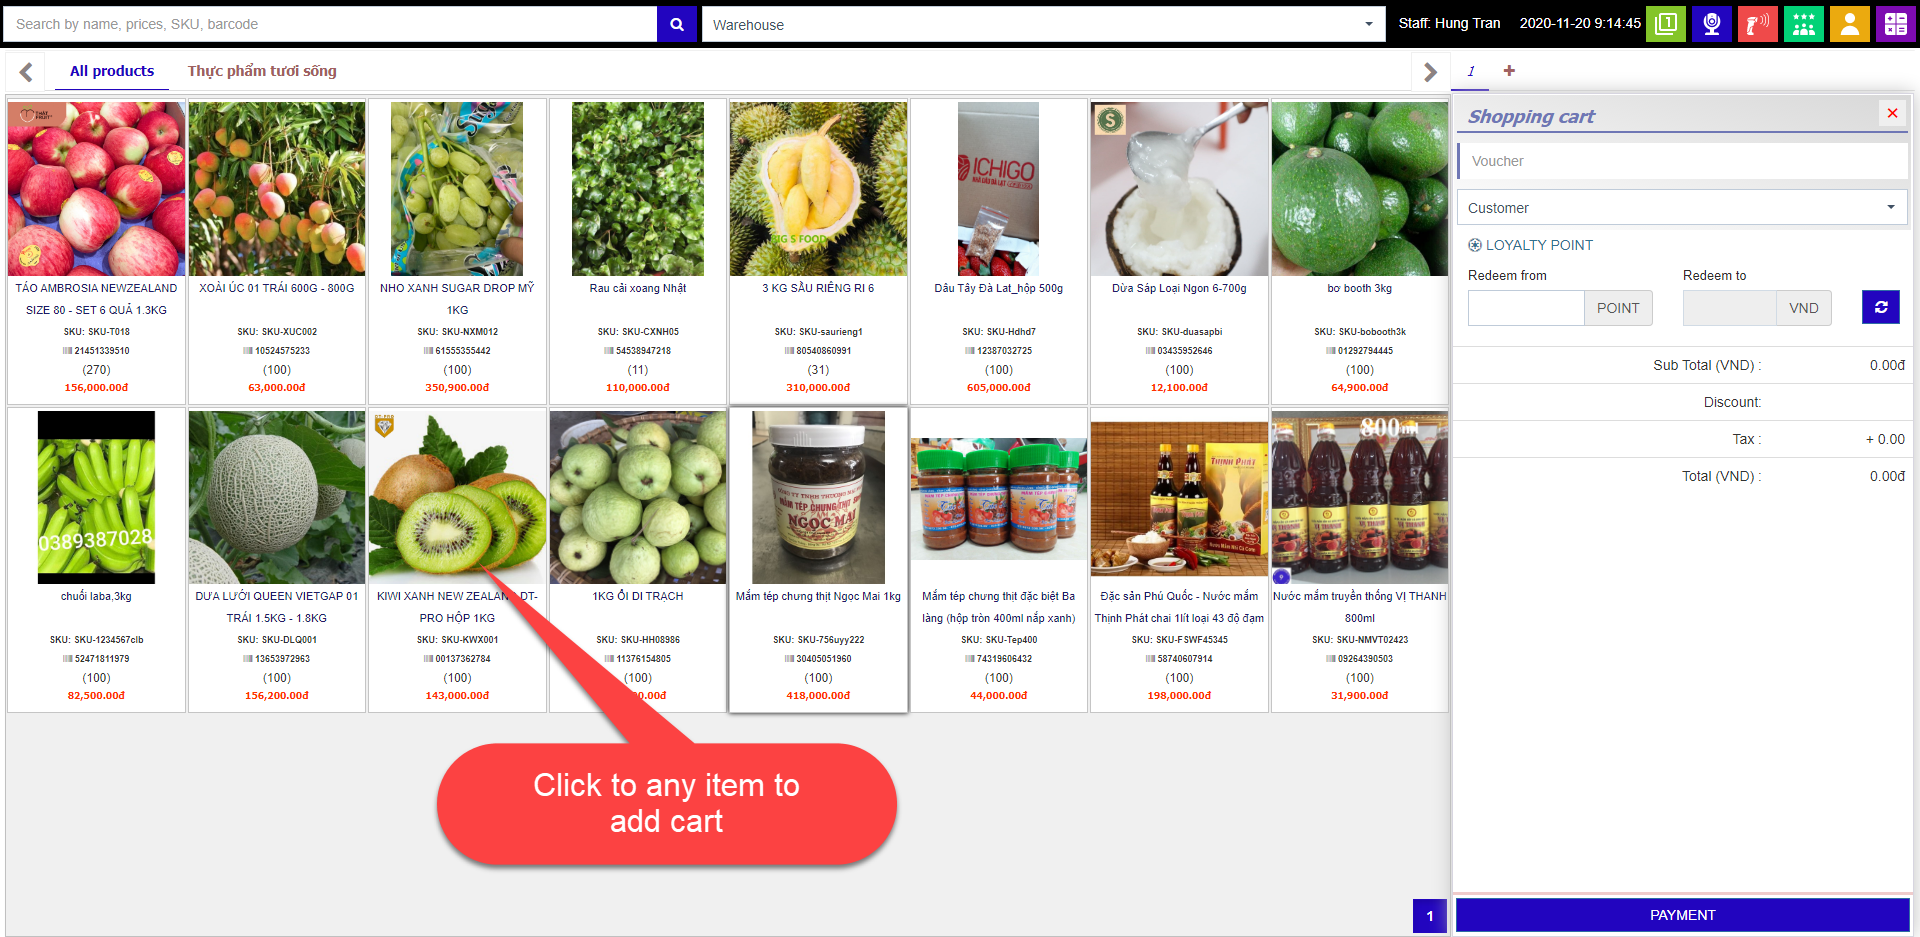
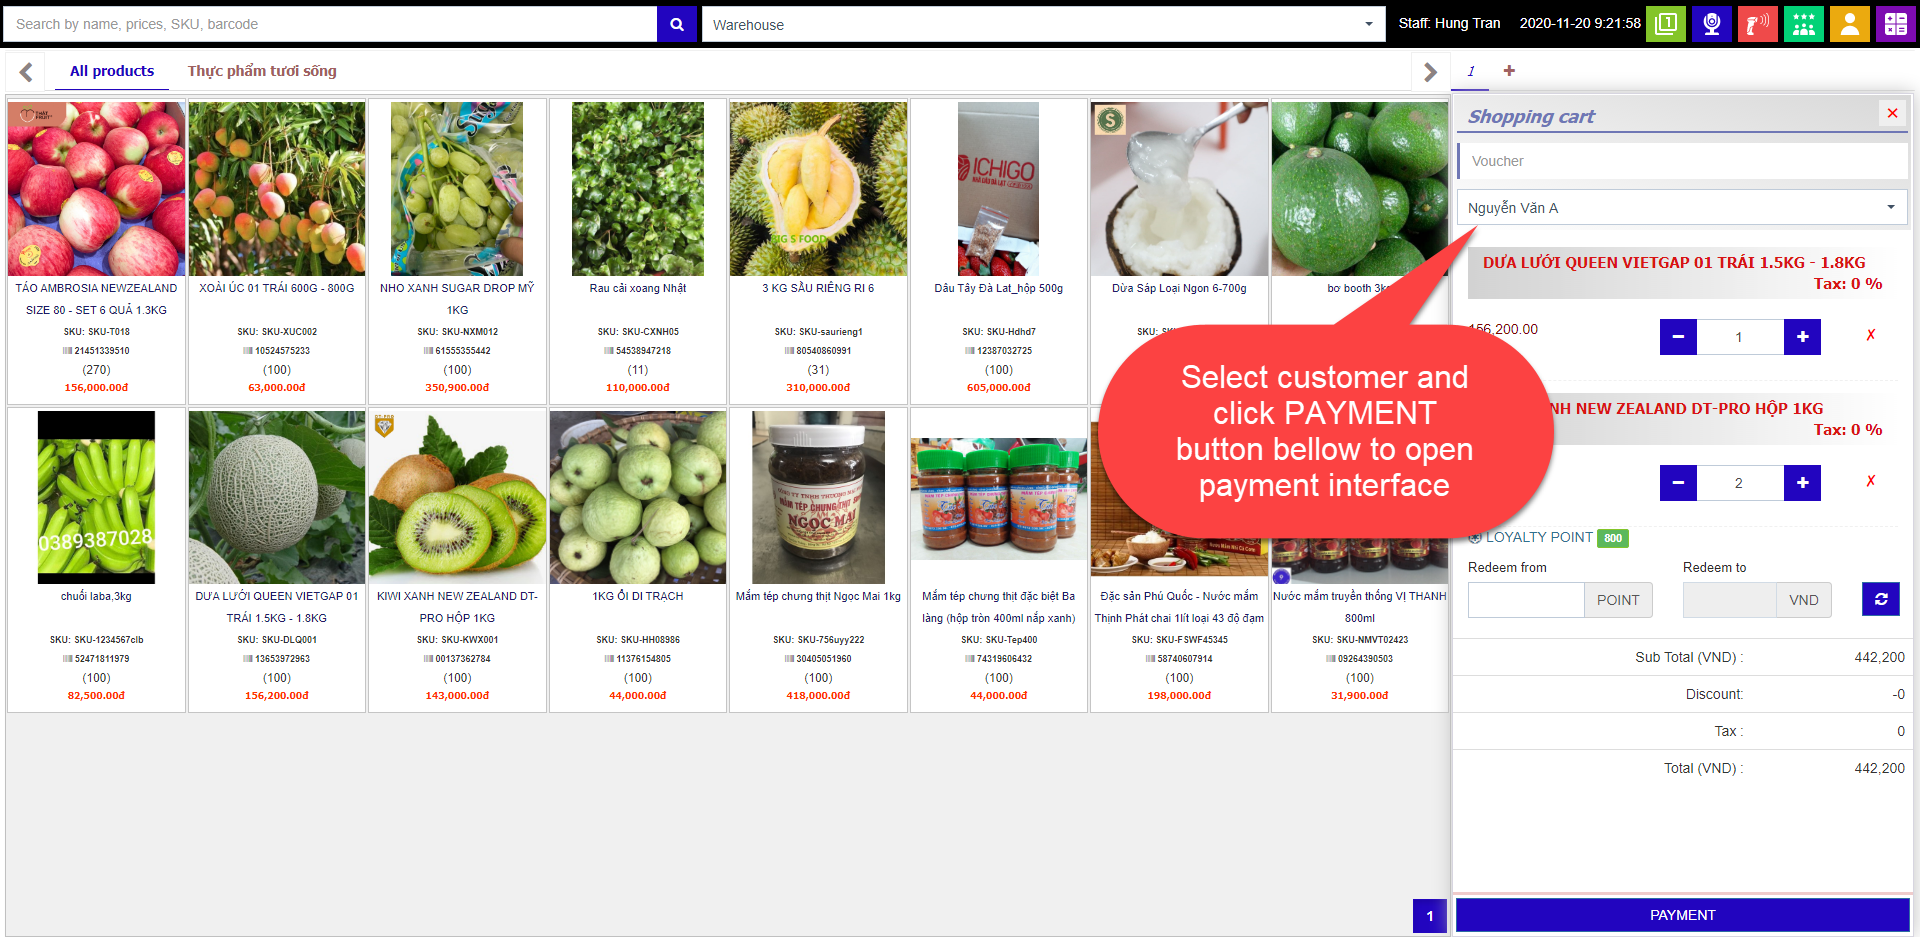
-To add new customer, click the icon as shown in the picture to open add customer interface.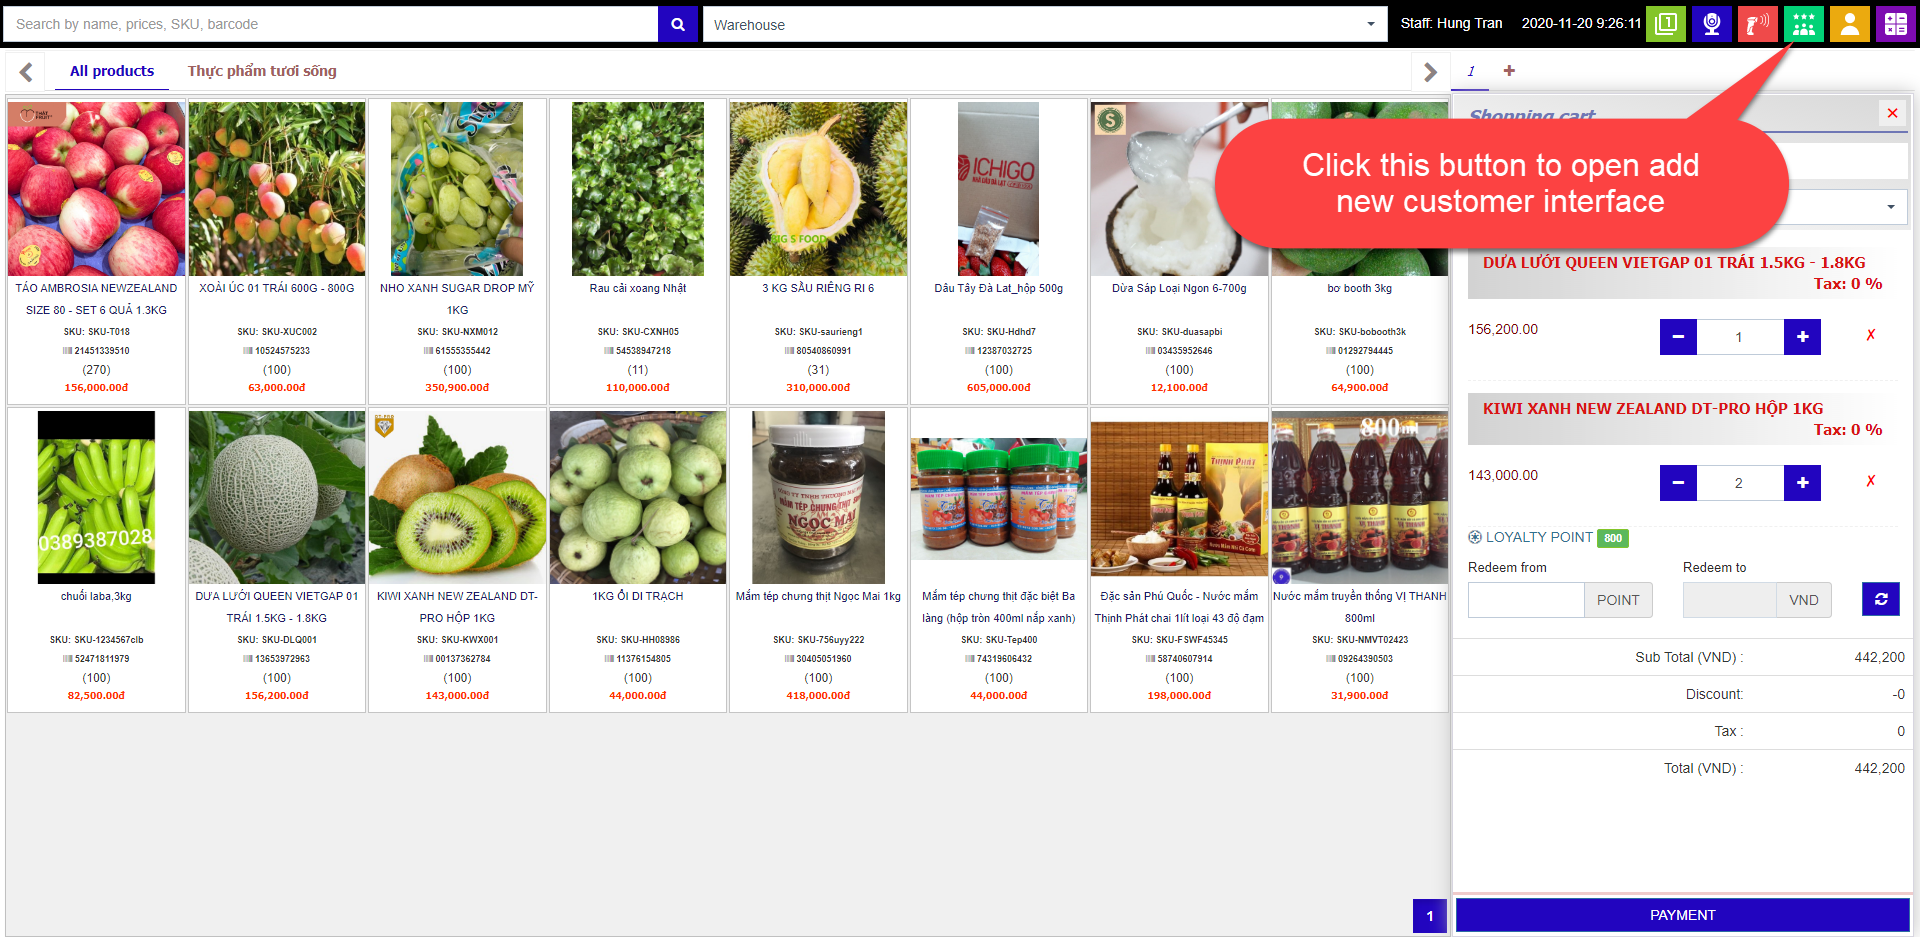
-Enter your information and click Save to add new customer.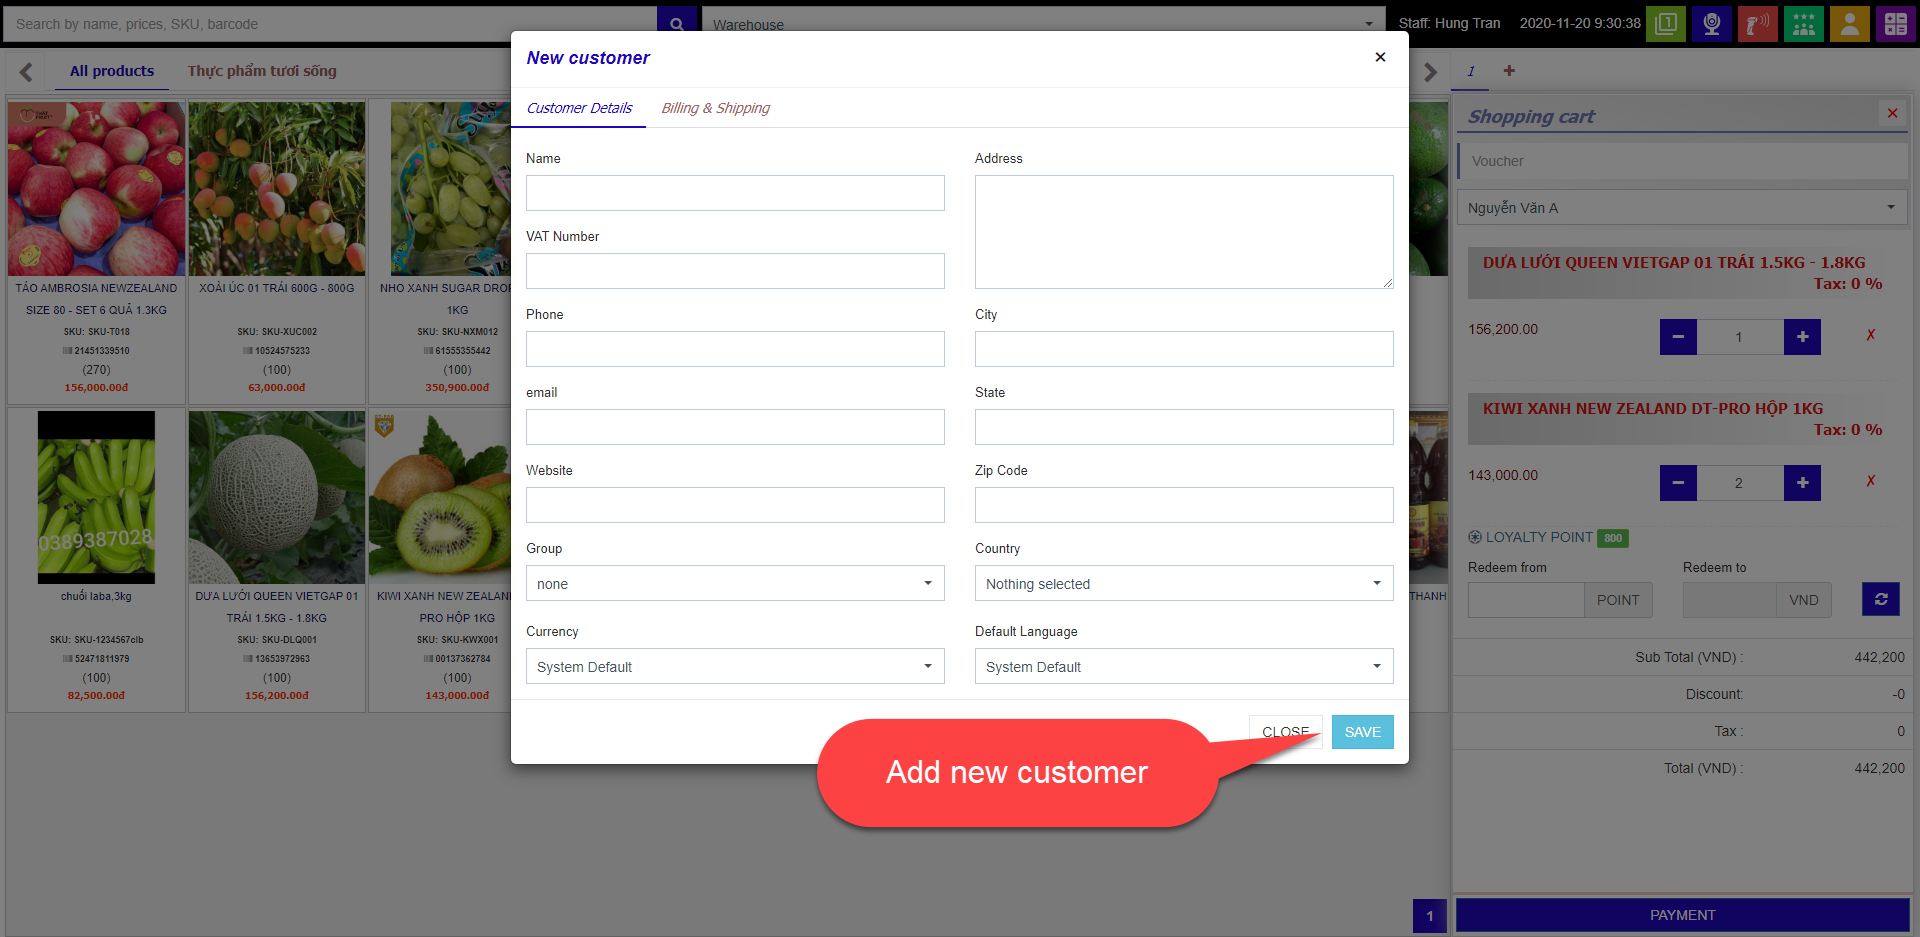
-To using barcode scanners to find and add product to cart, please connect barcode scanners to POS machine and scan barcode printed on product packaging.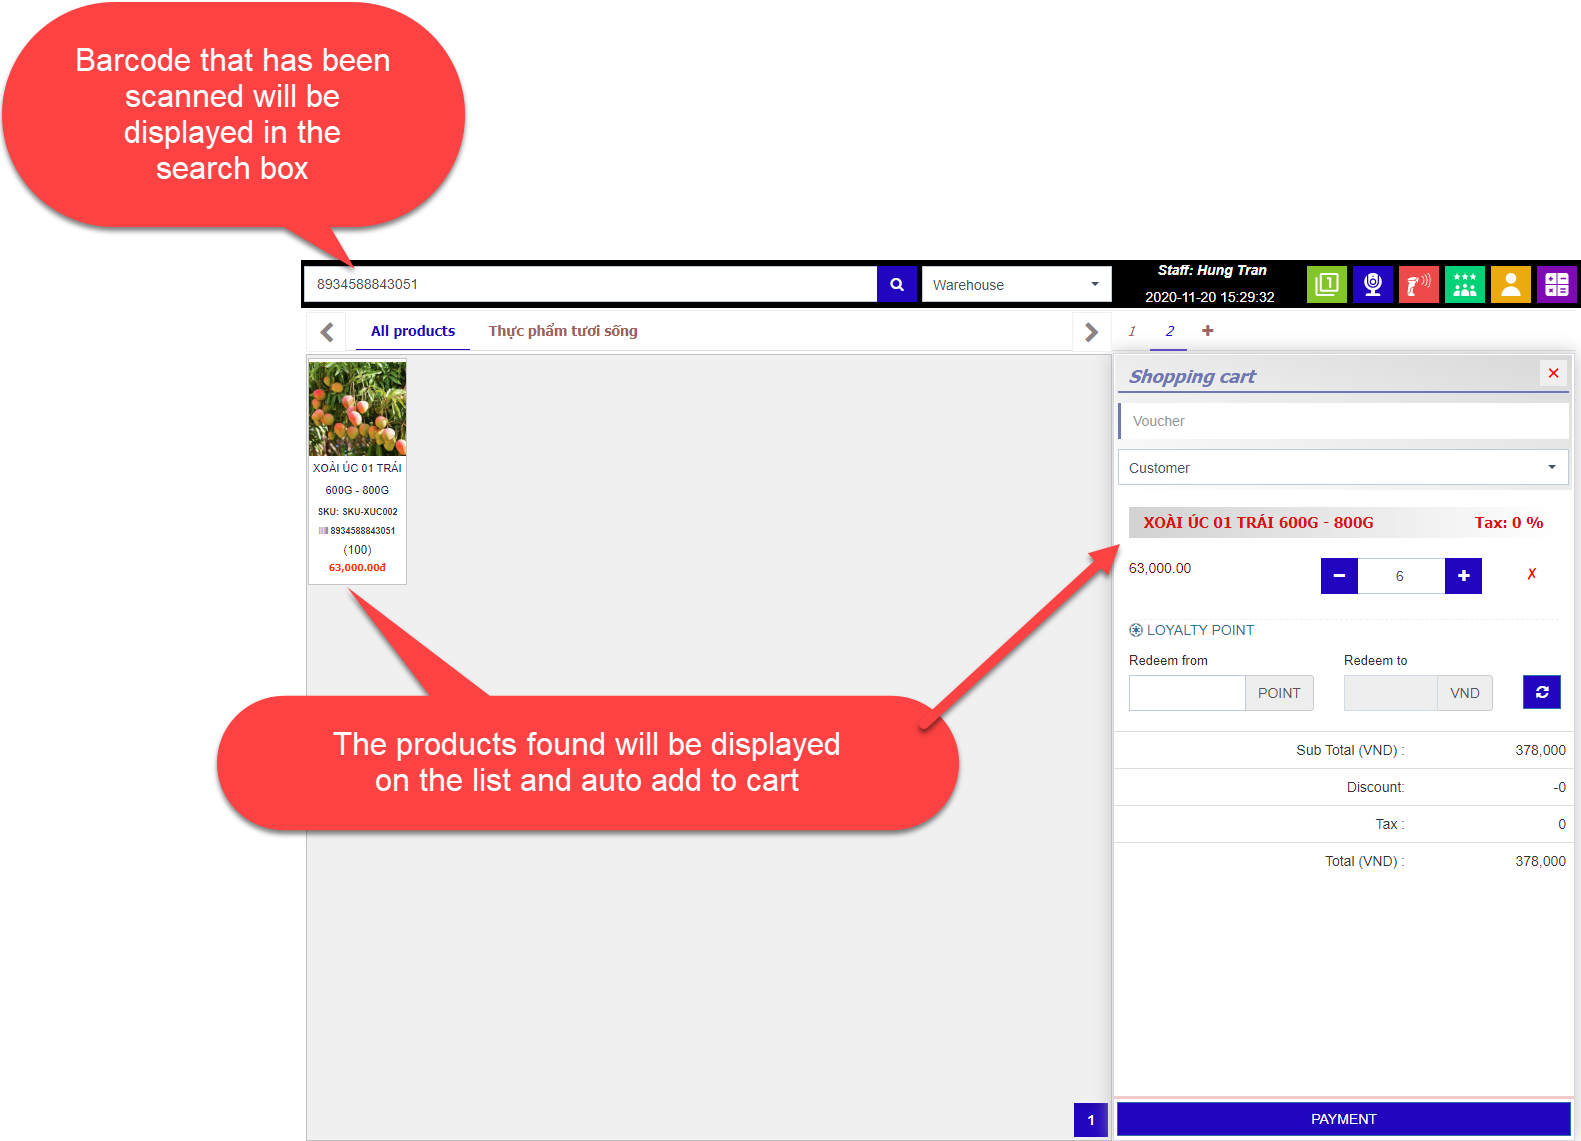
II. How to use Omni-sales PORTAL
- Add product to PORTAL
-From Sales channel management, click Setting product link to go to add product page.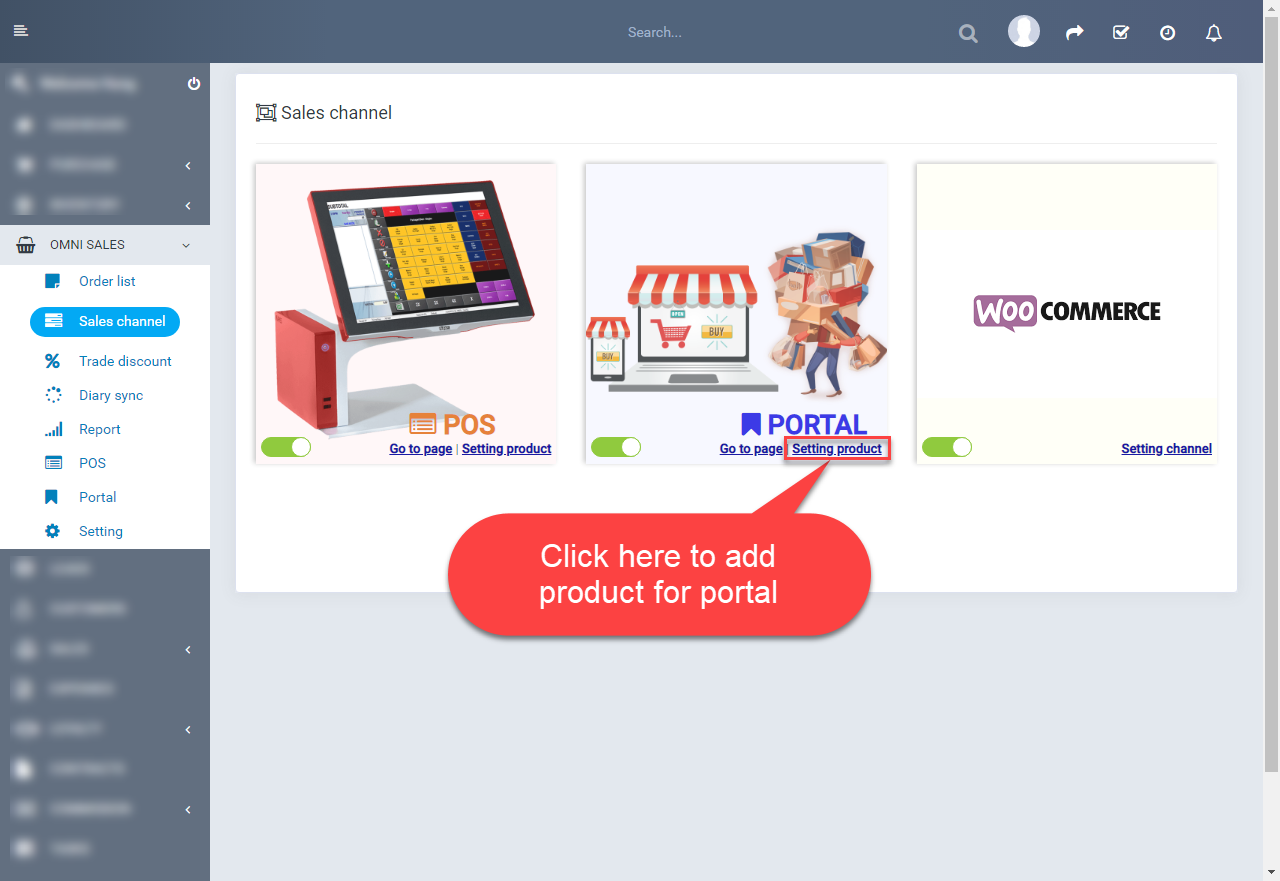
-Continue, click Add button to open add product interface.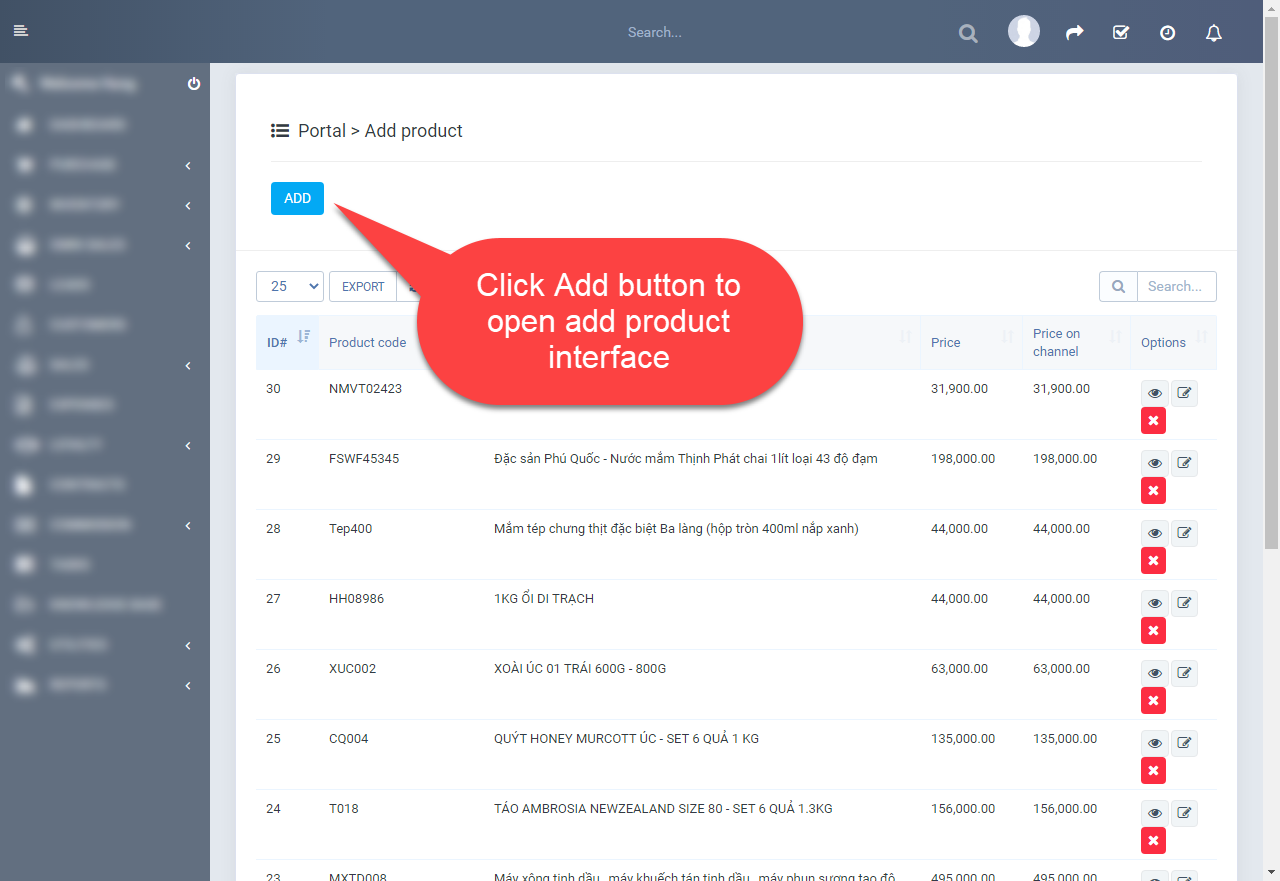
-Select Group product to fillter product list bellow. Select product and click Save to add product.
- Order
-Select Portal in the left menu to go to portal page.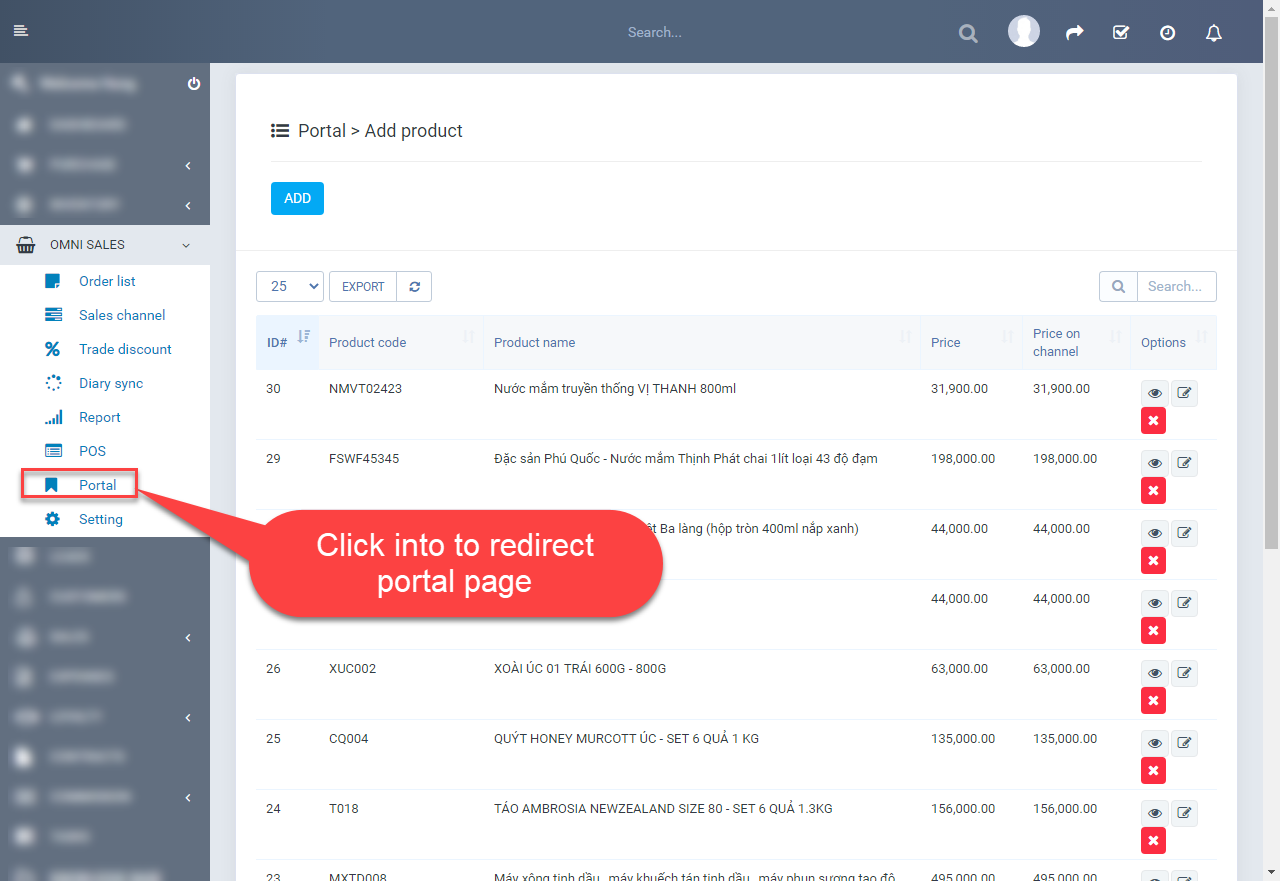
-In the portal page. Choose product, change quantity and click Add to cart button to add product to cart.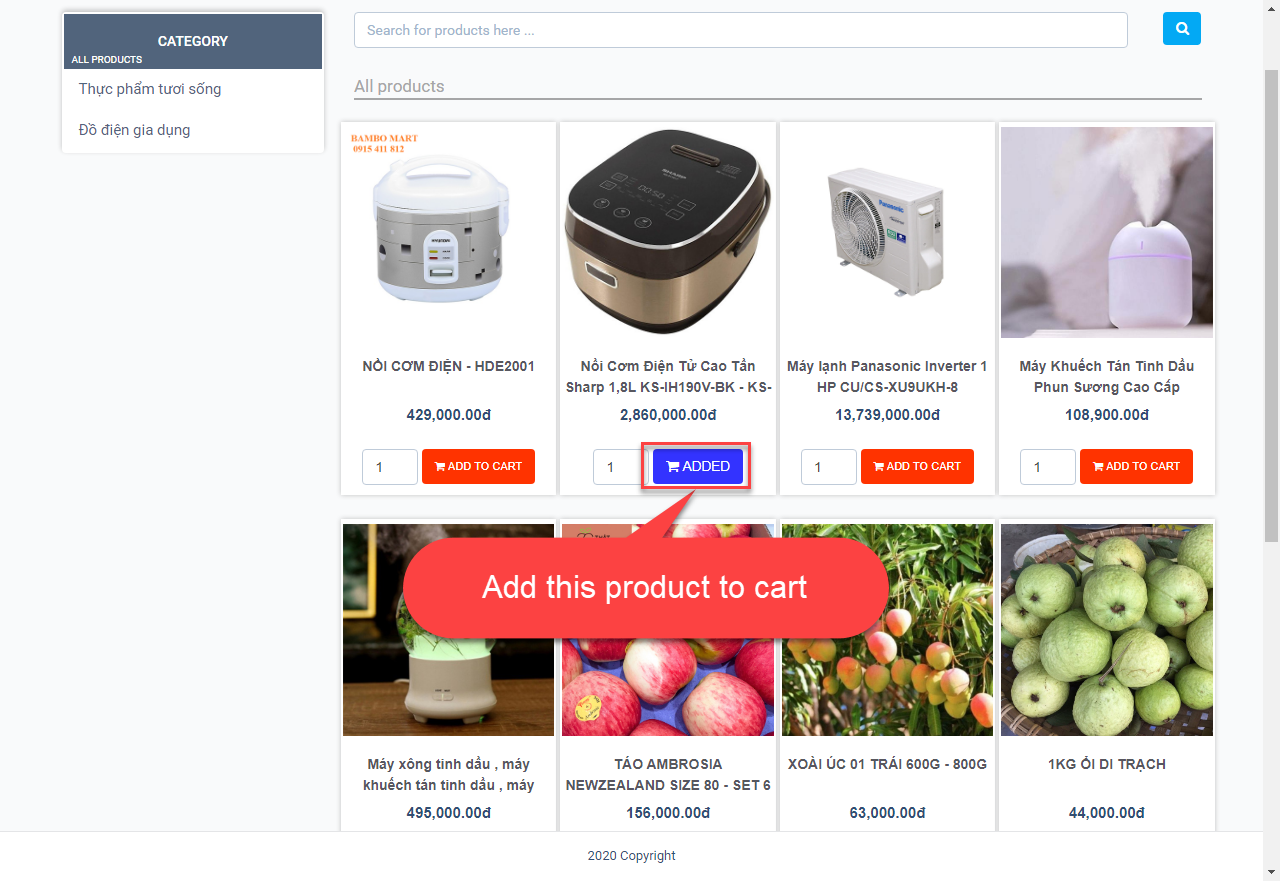
-When view detail product, you also can add product to cart.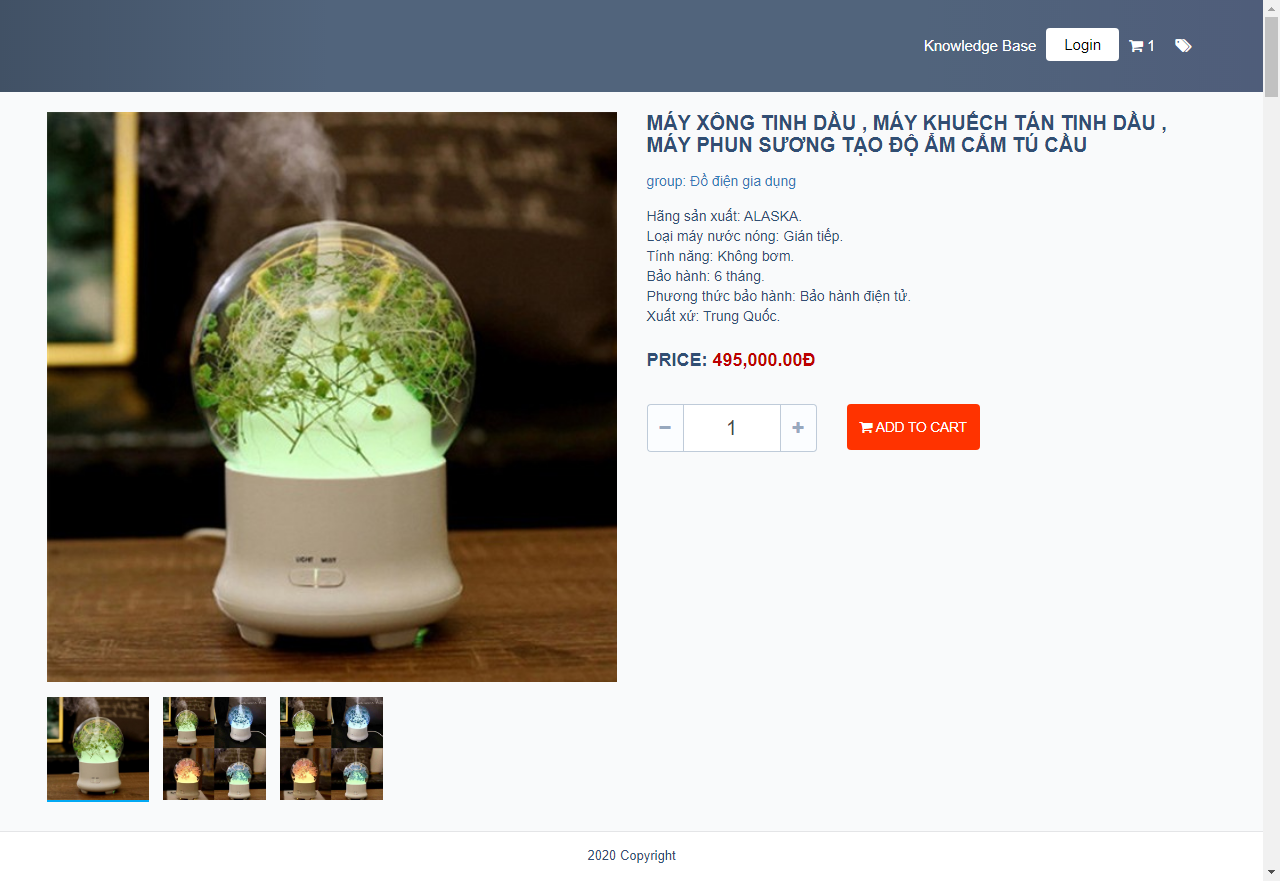
-Click cart icon to view cart and order.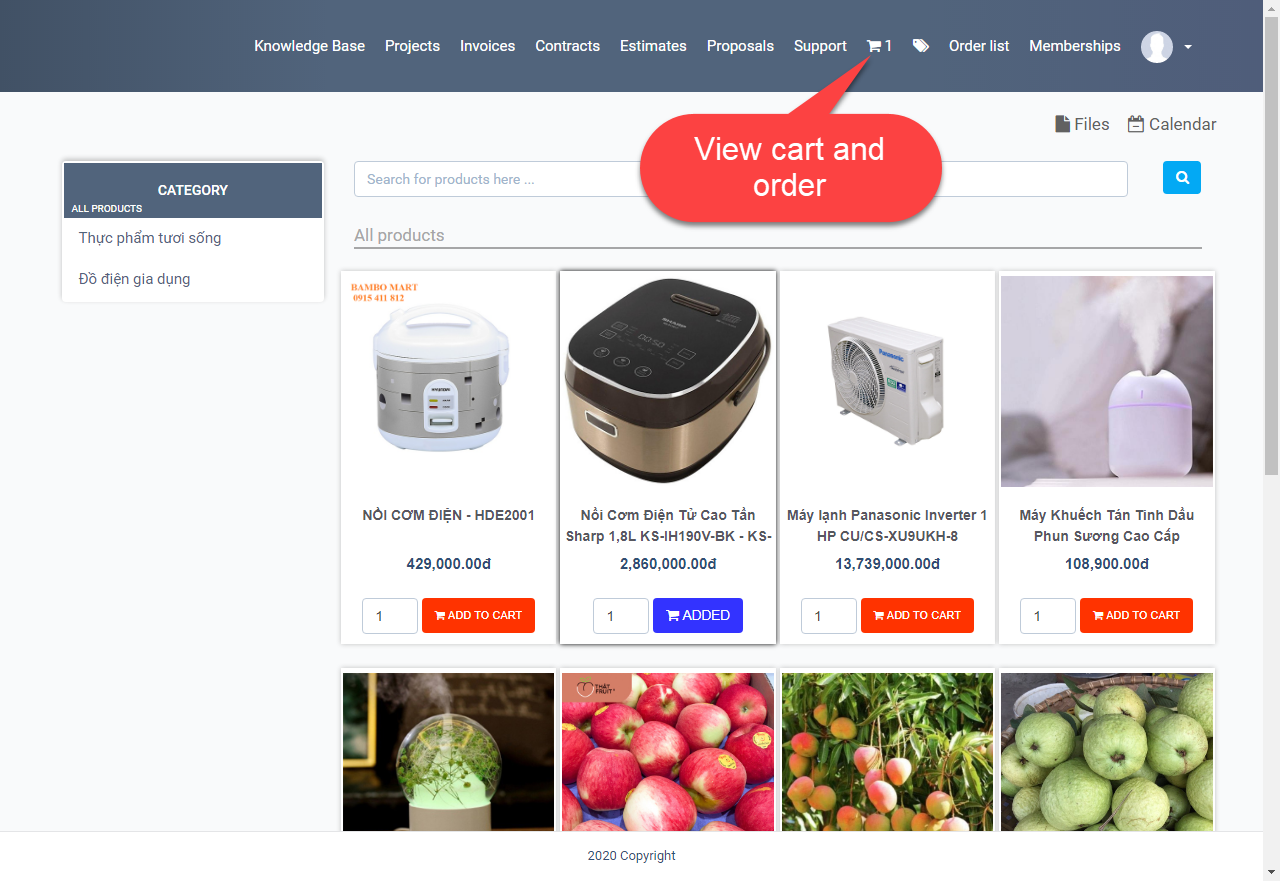
-In the cart, you can change quantity or delete product. After, click Order button to redirect confirm delivery information page.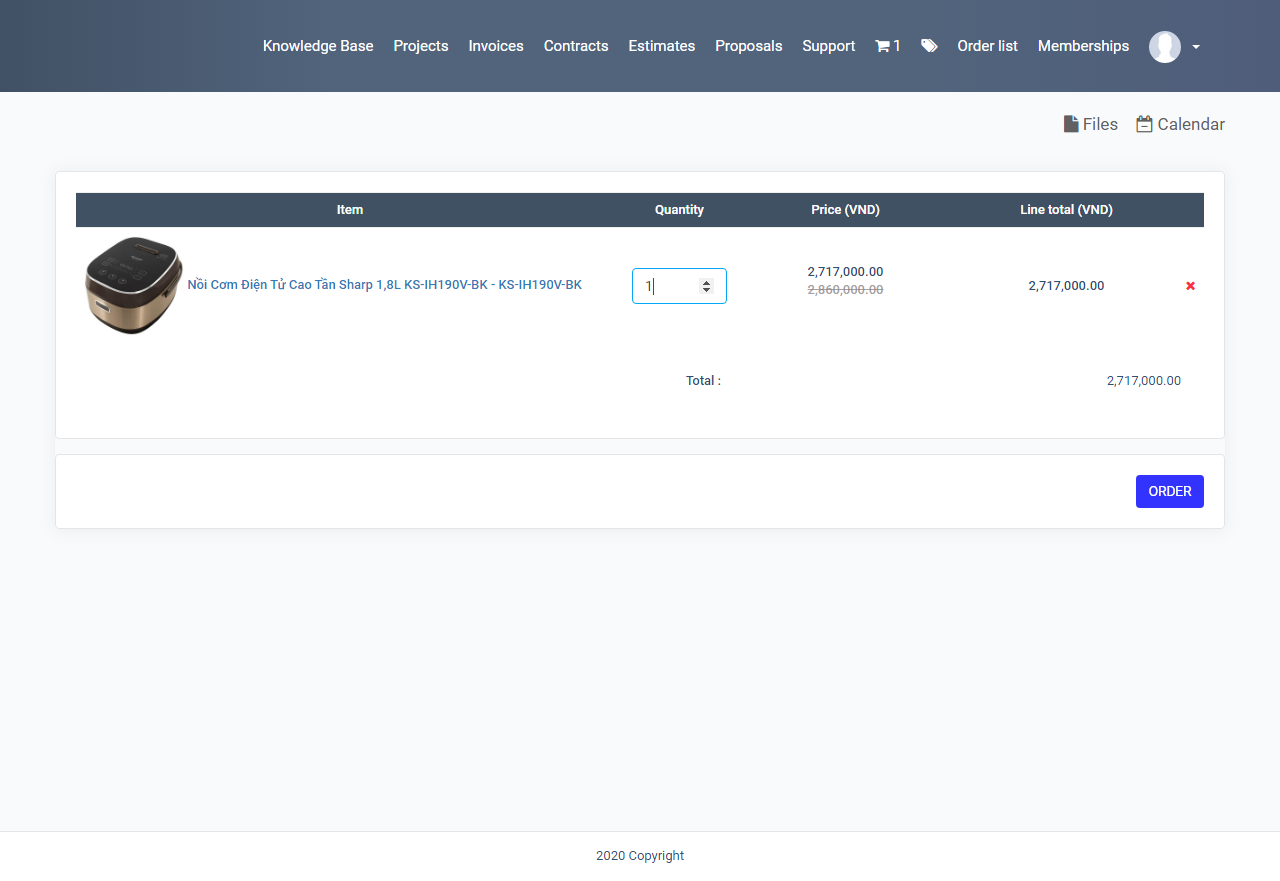
-In this page, you can input voucher, select payment methods and click Order button to order.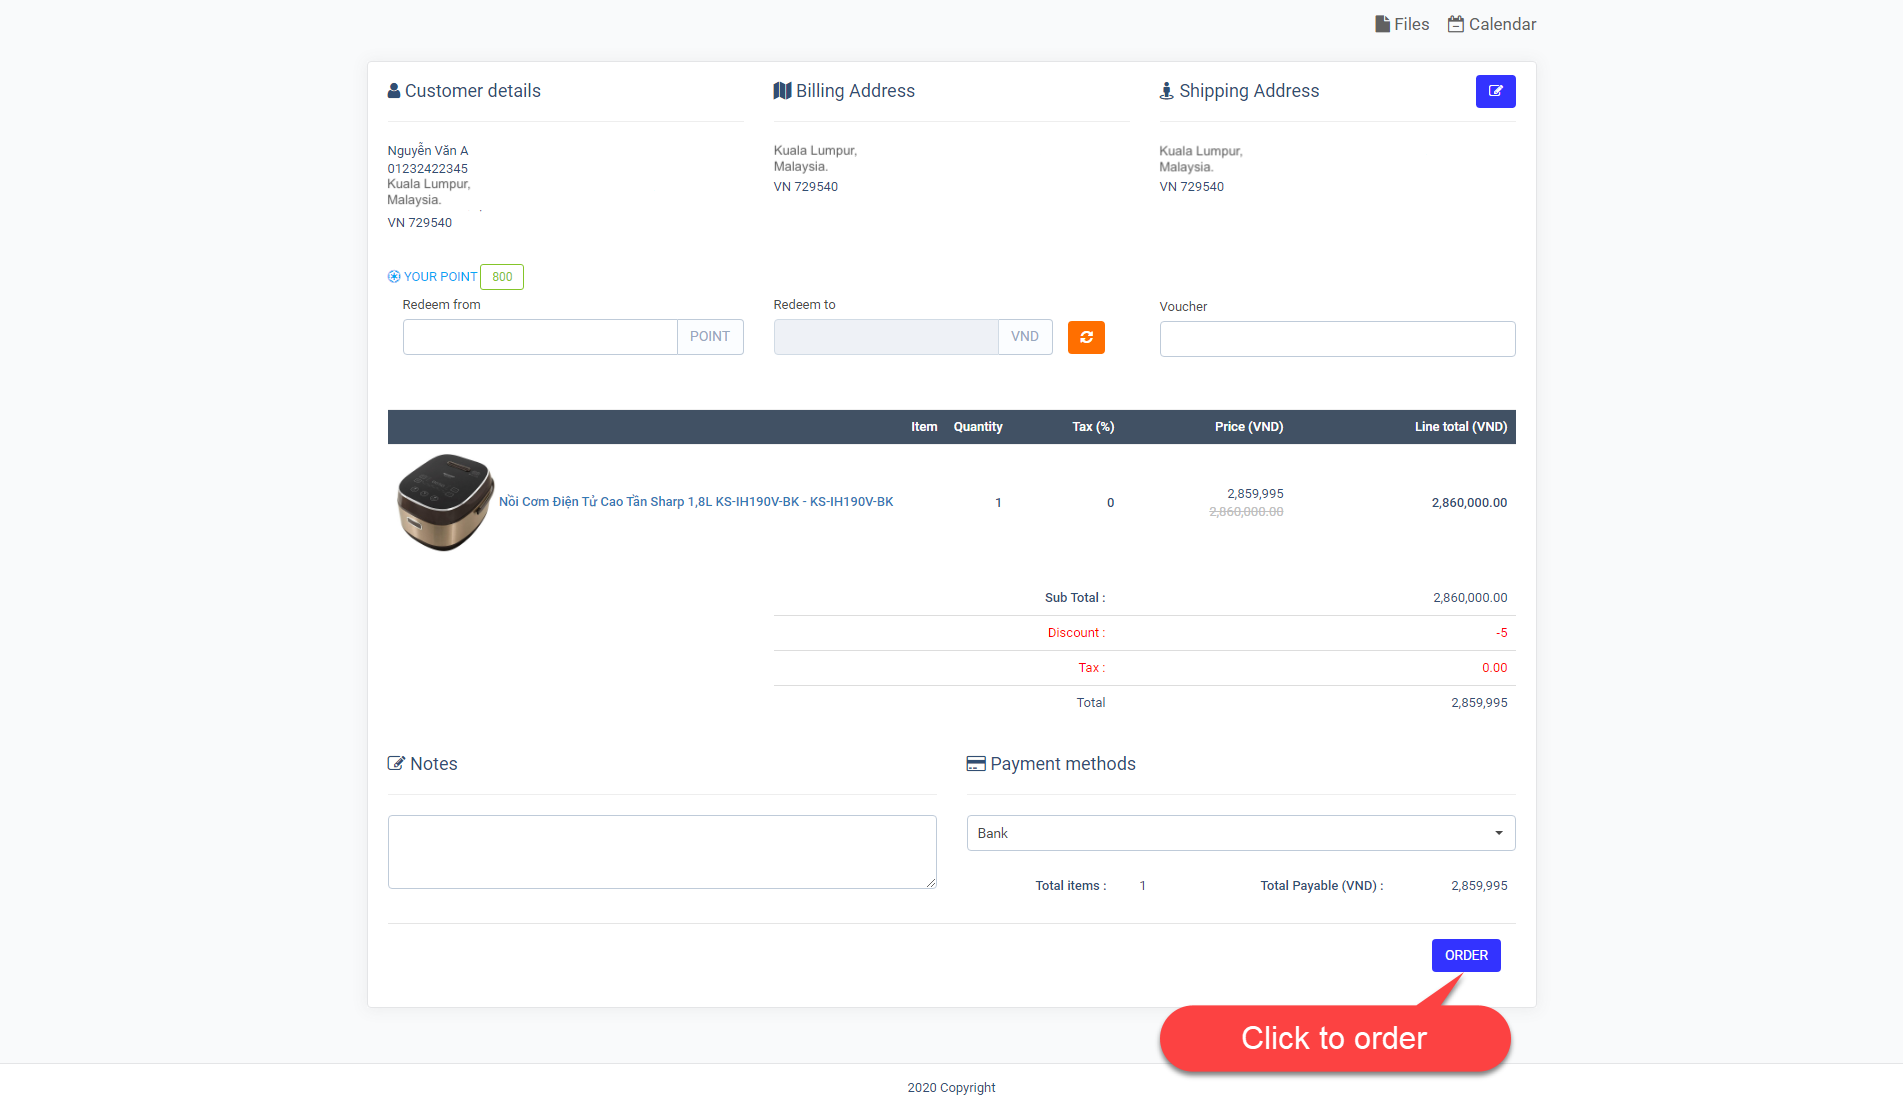
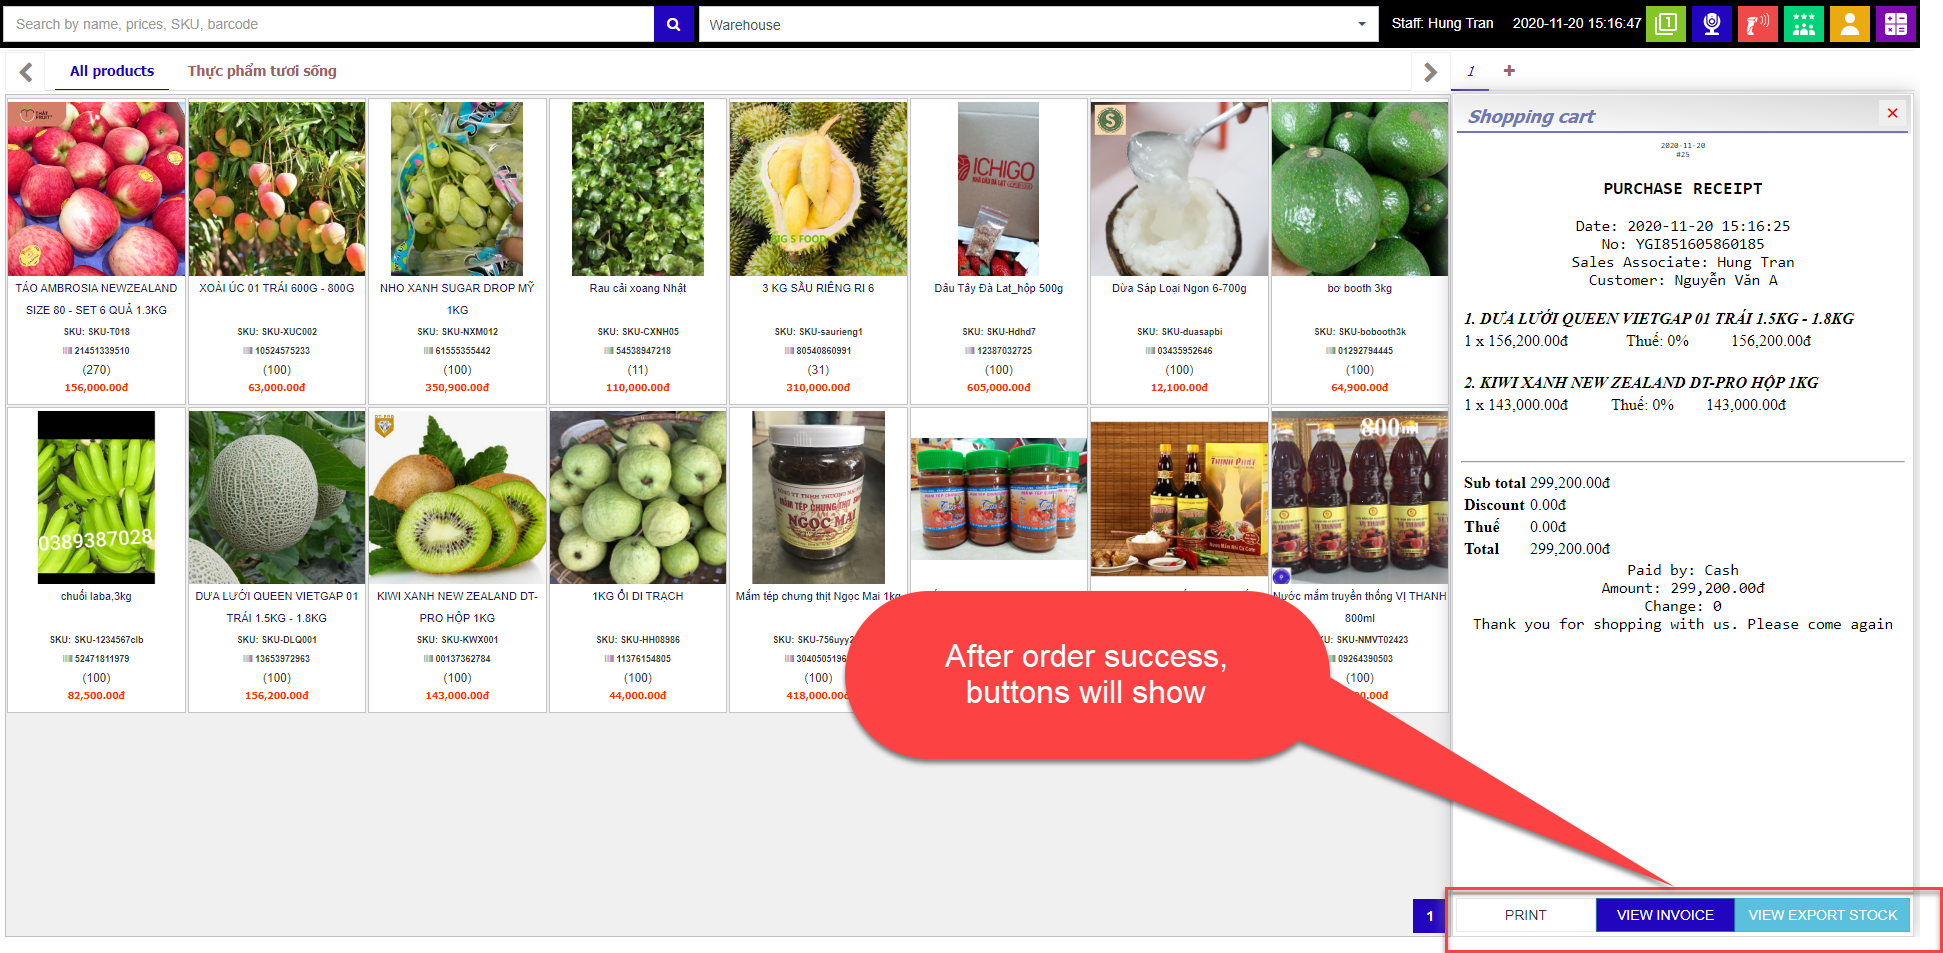
-After order successfull, you will see detail invoice.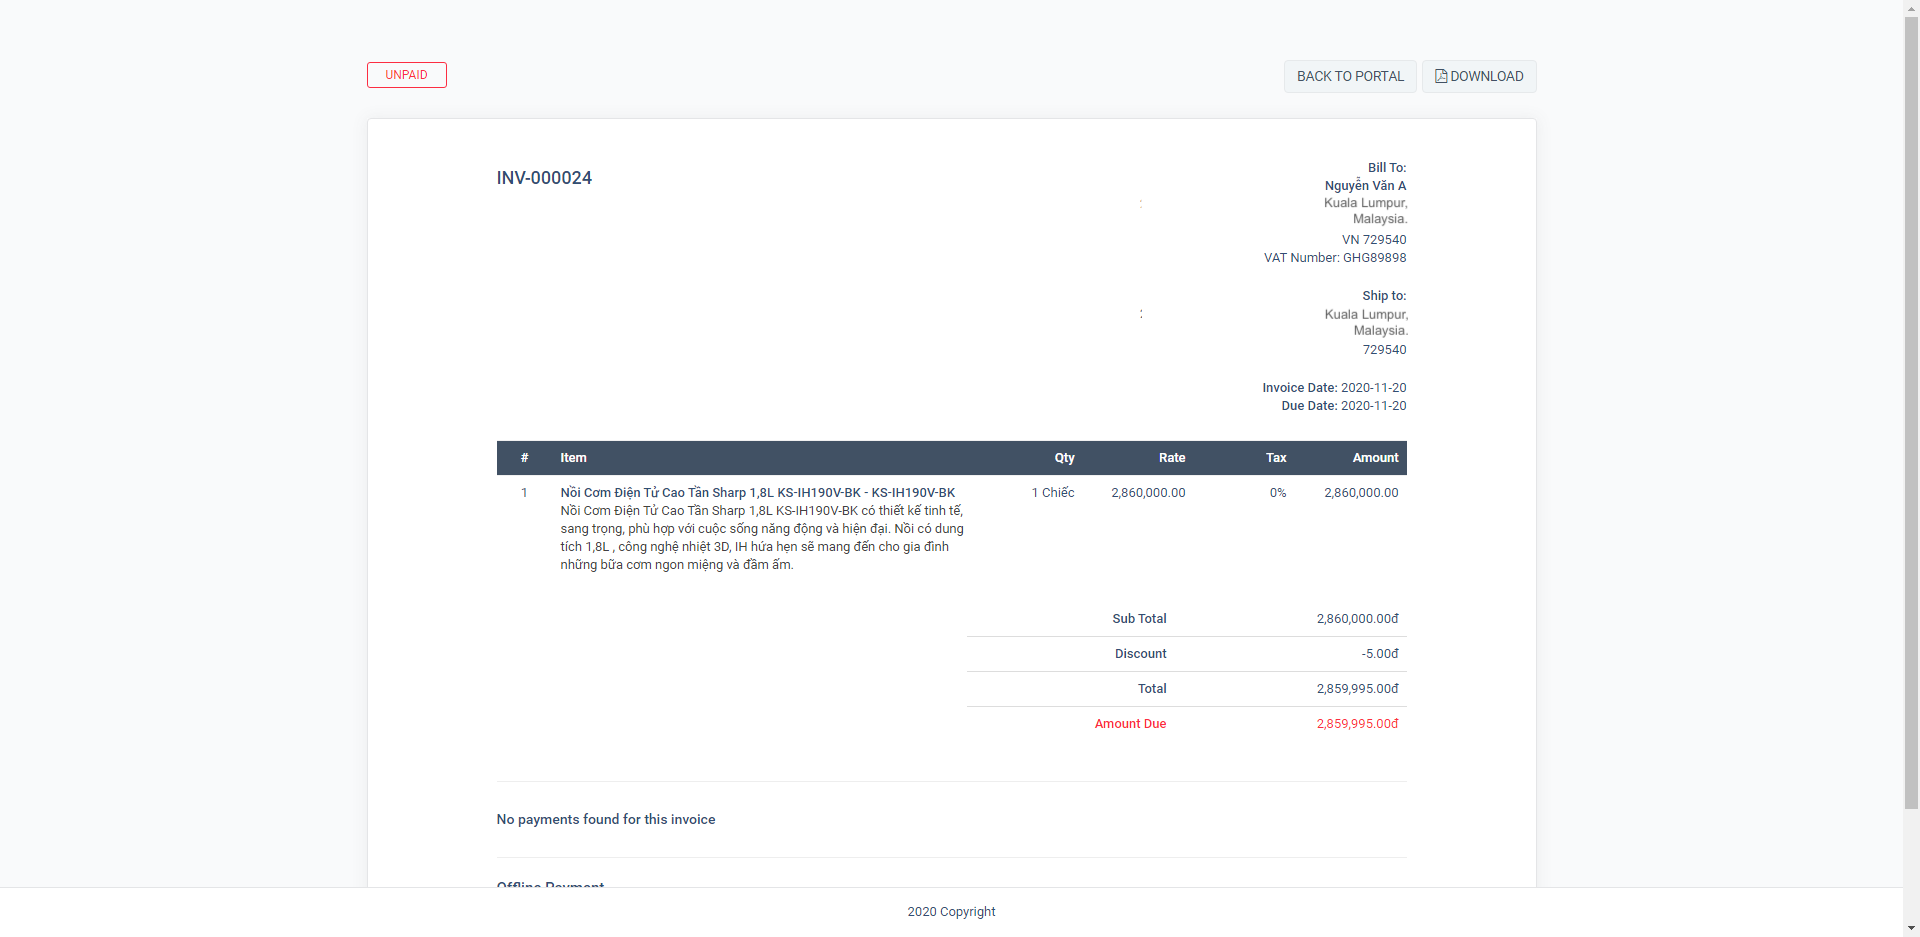
-To view all order, please click Order list link in top menu.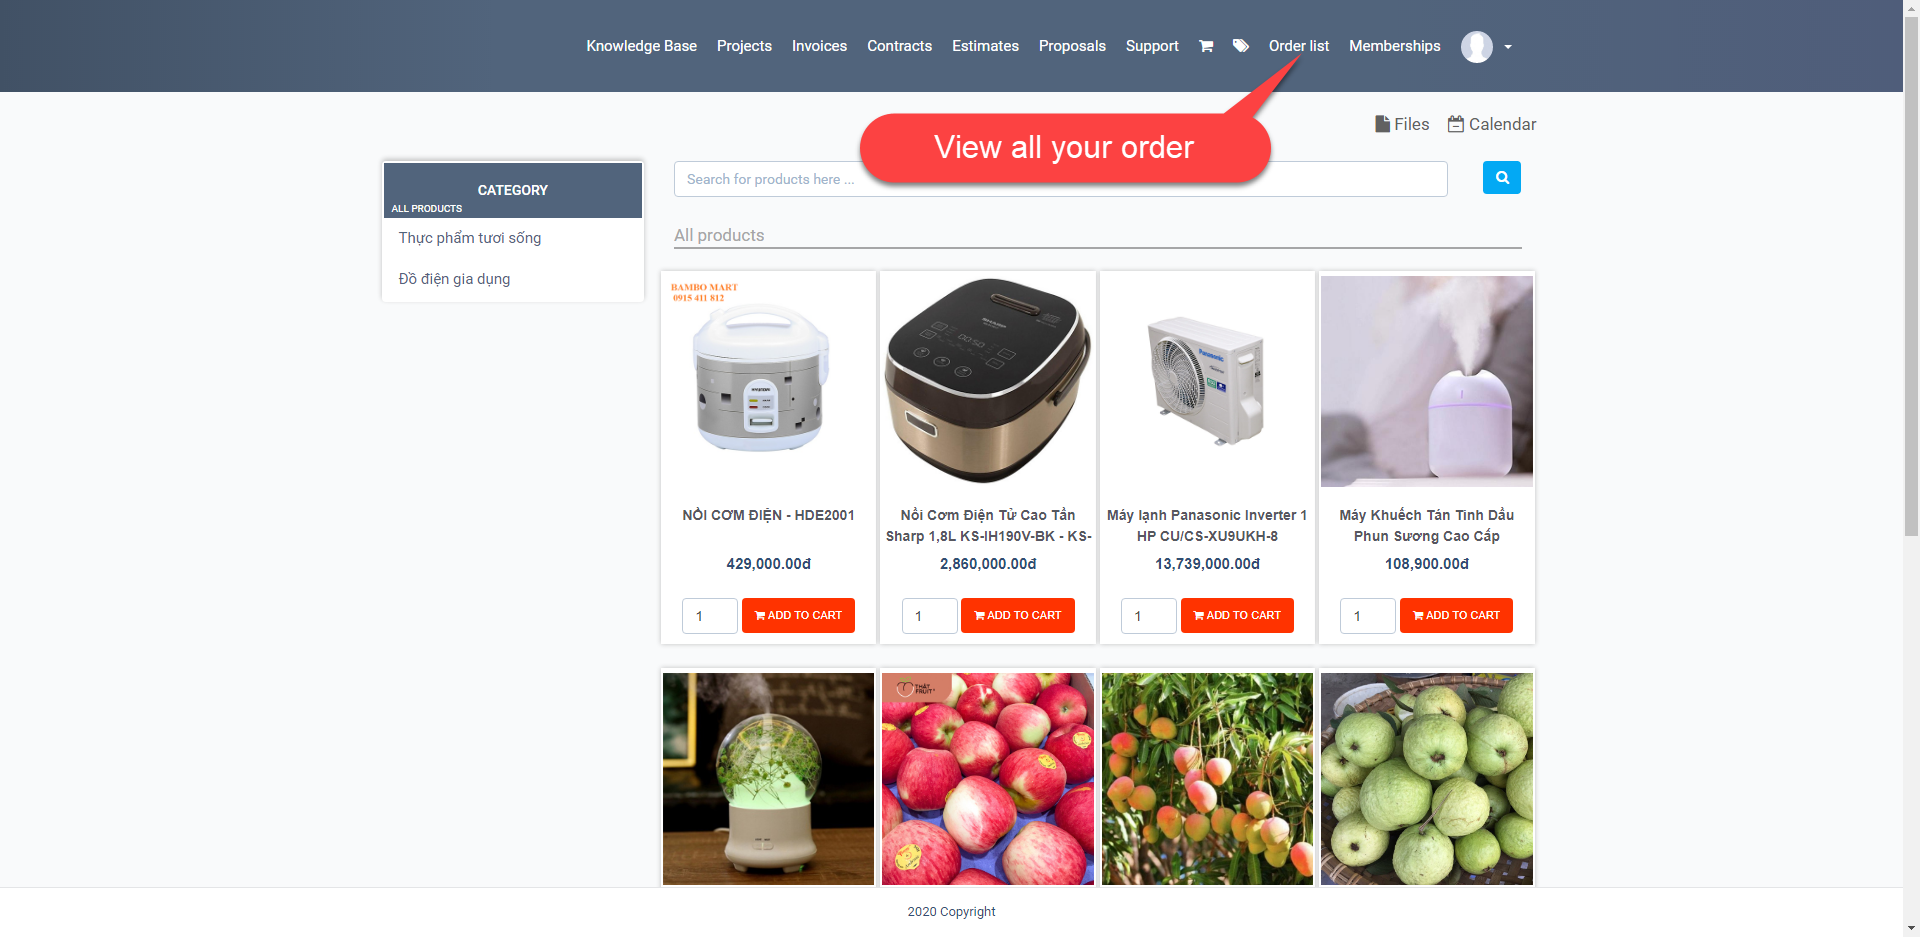
-Order will has five status: Proccessing, Confirm, Being transported, Finish, Cancelled. You will track your order with these five states.
-Click VIEW ORDER button to view detail.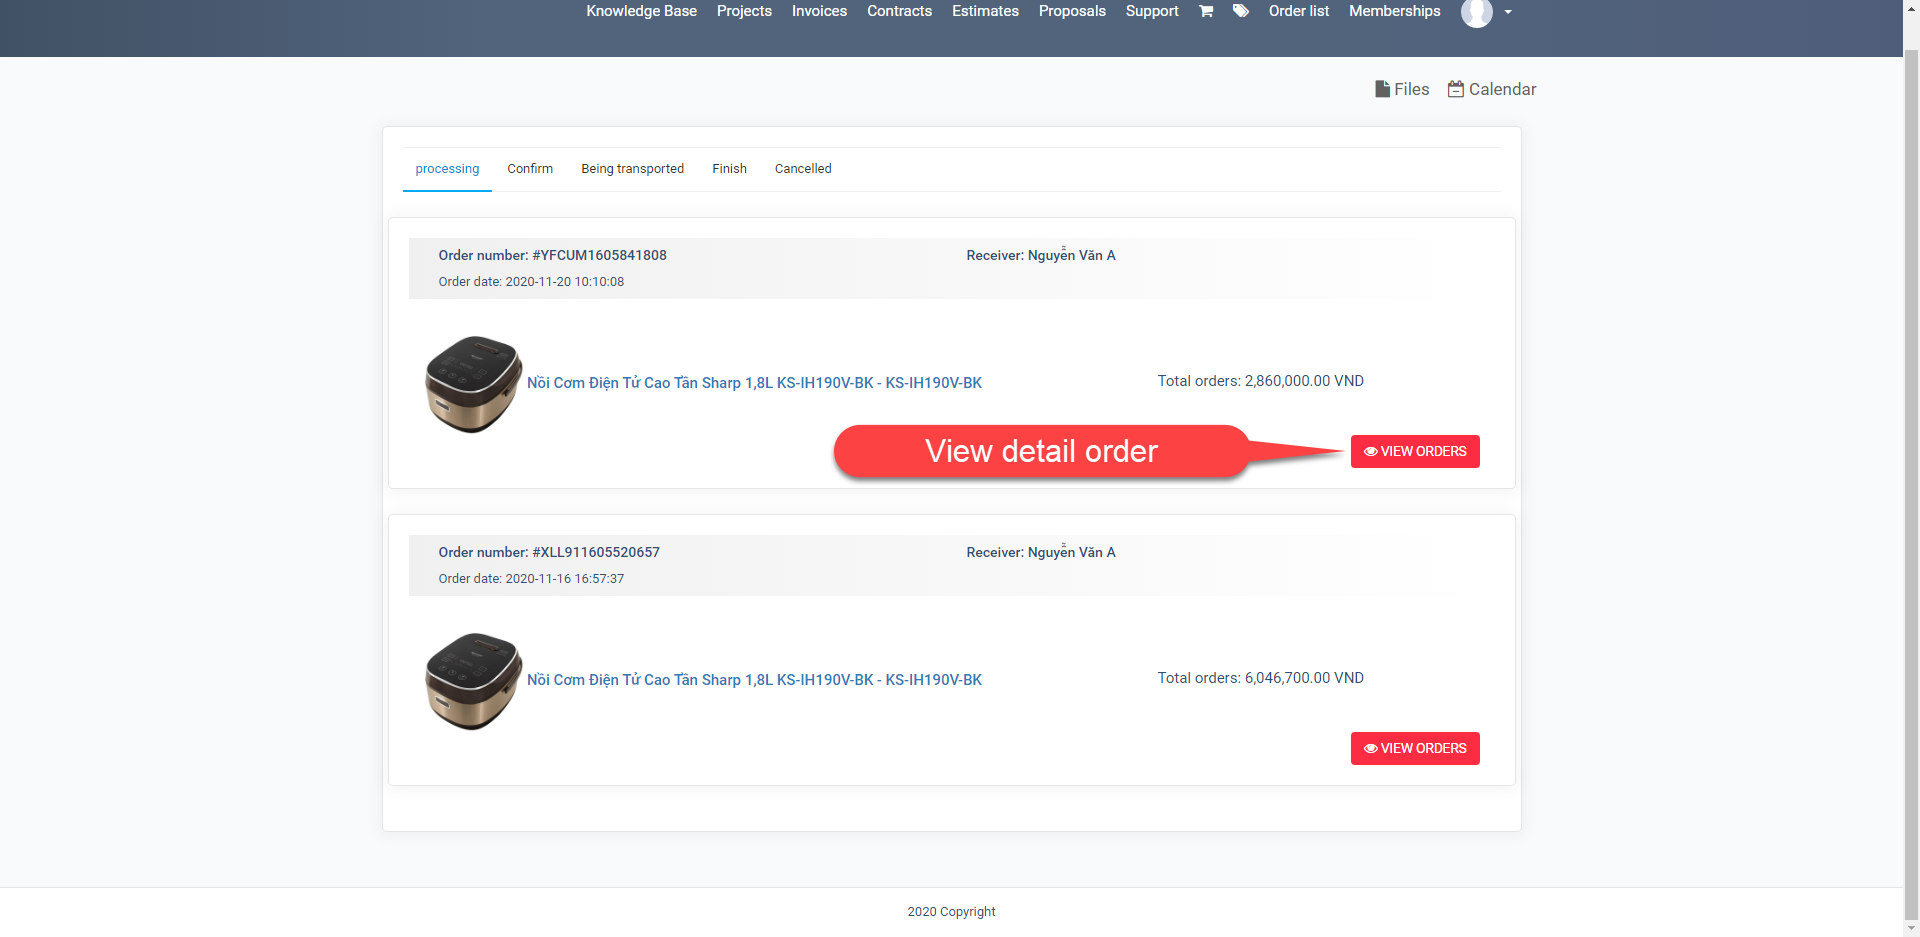
-In detail page, you will see current order status and you can Cancel order if order has status is processing.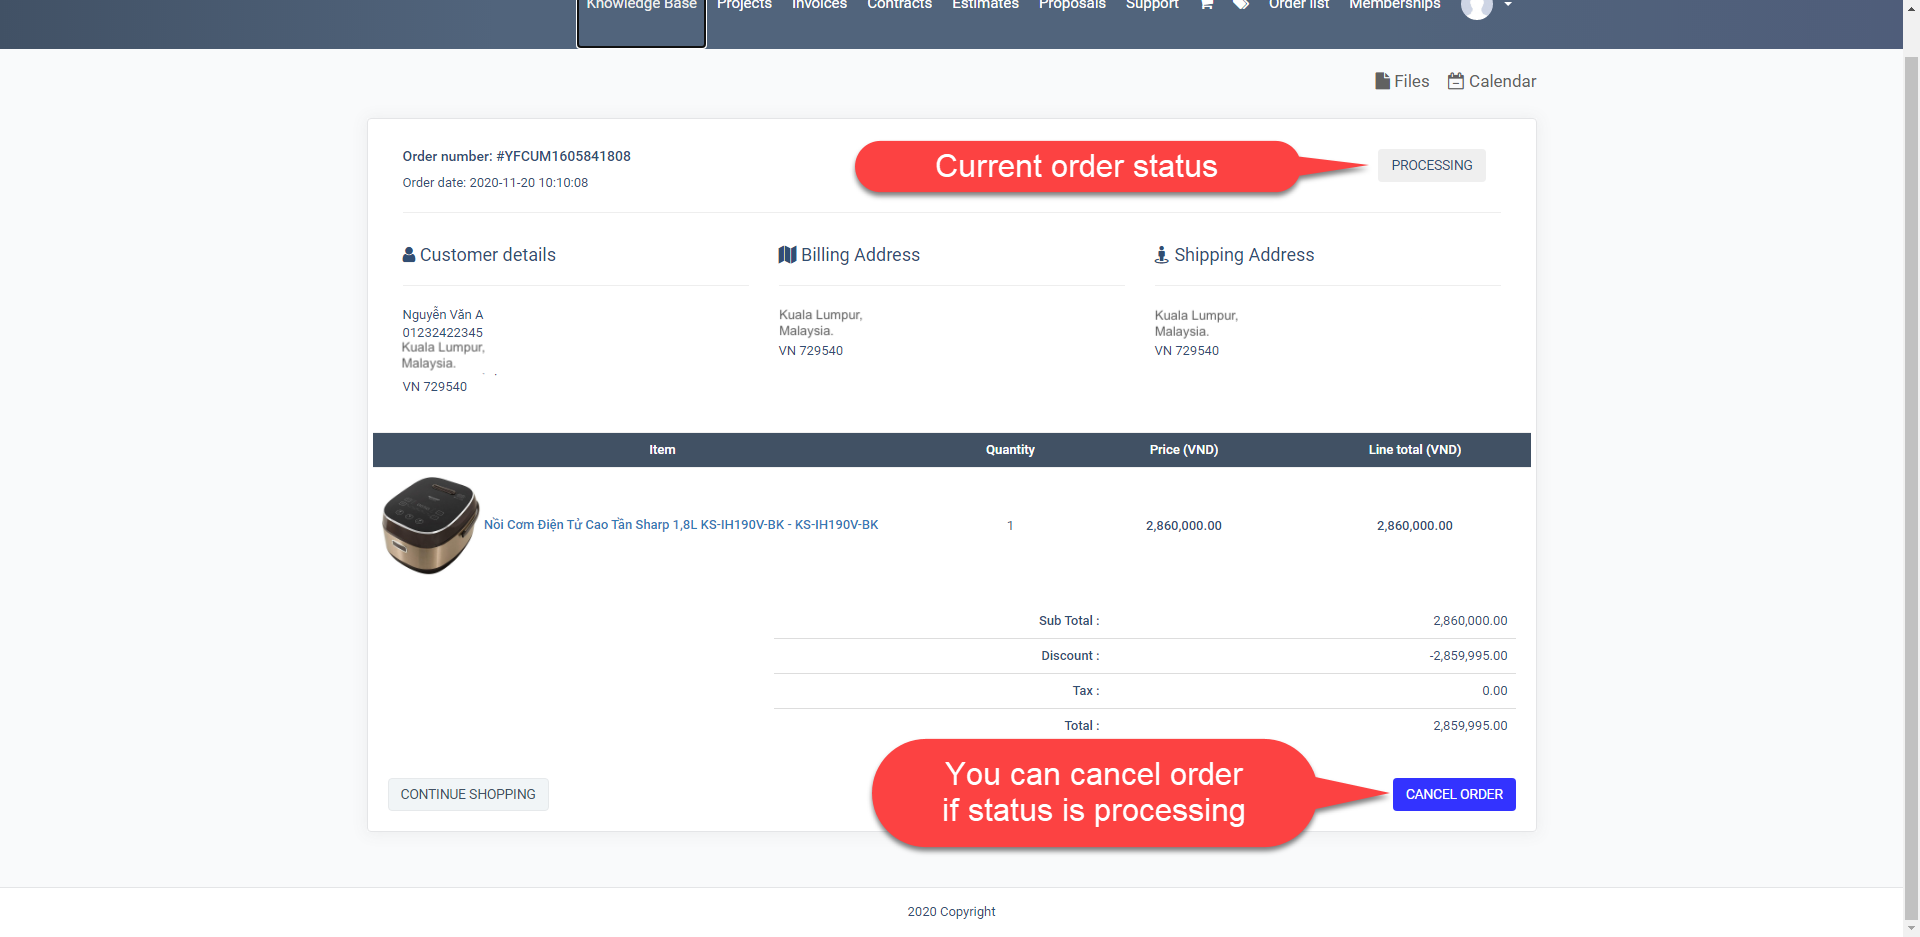
-For administrators: access Order list to view all order list.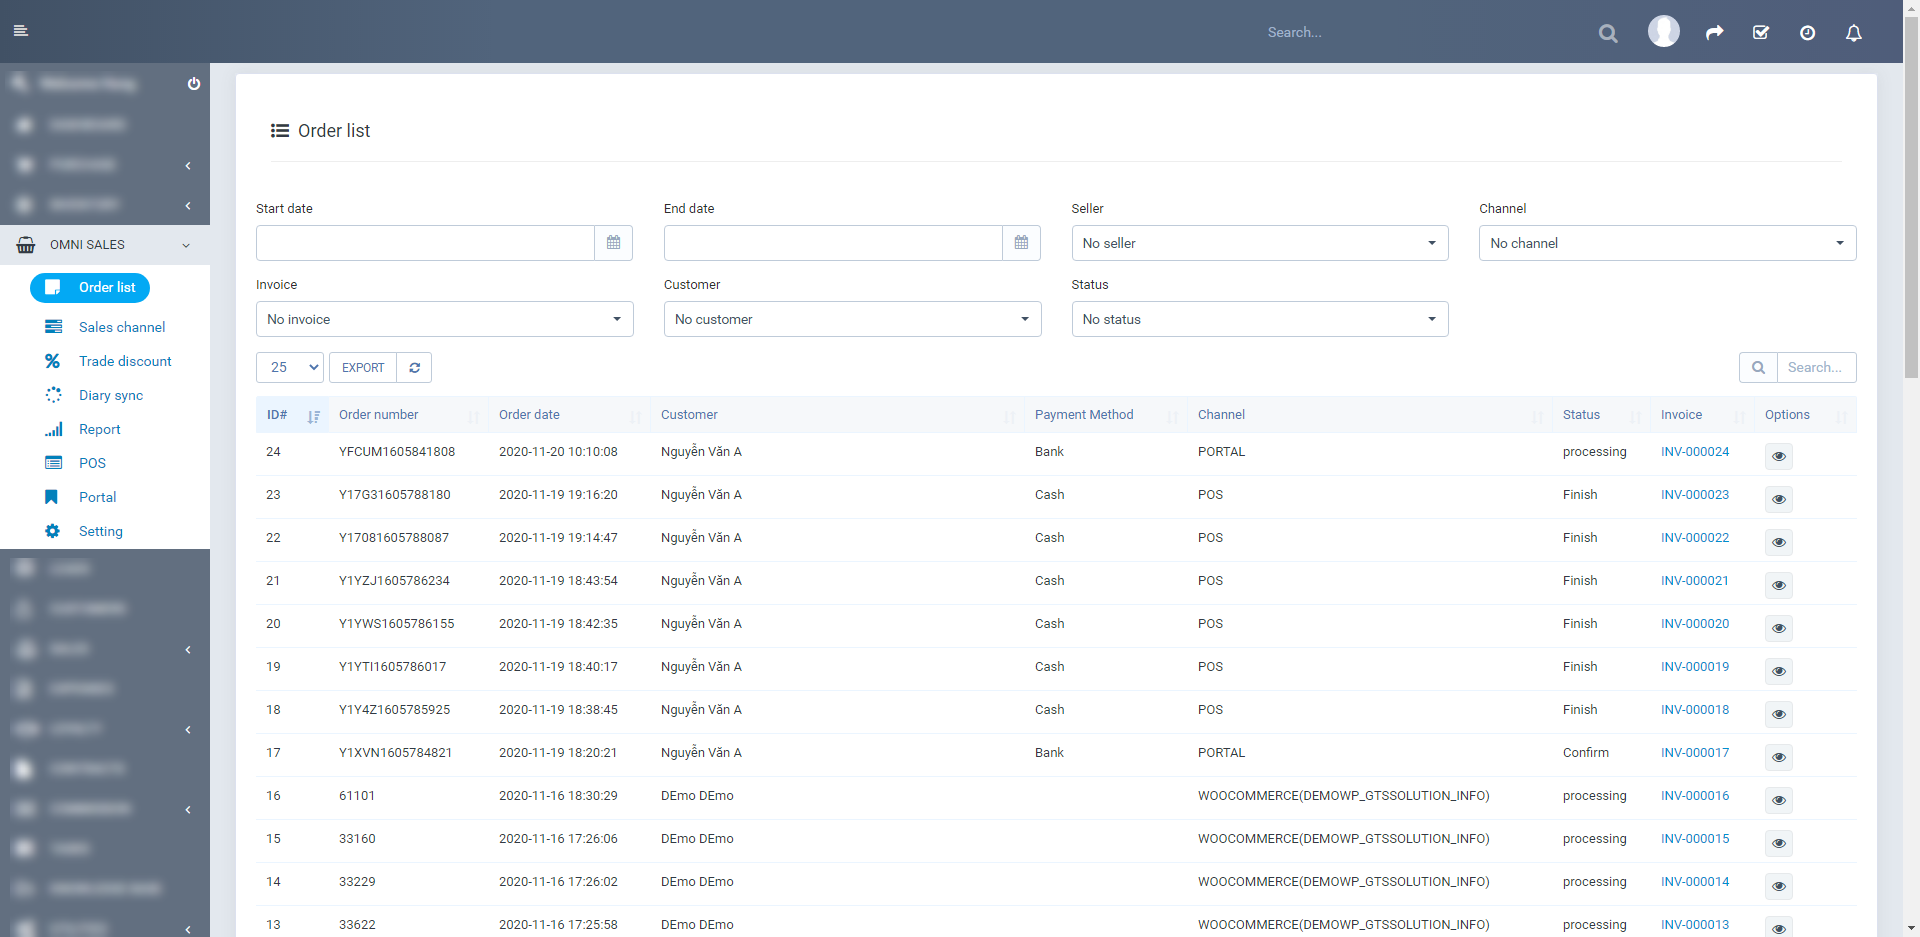
-In order list, admin will see order status and quick info of order. To view detail, you click on the eye icon.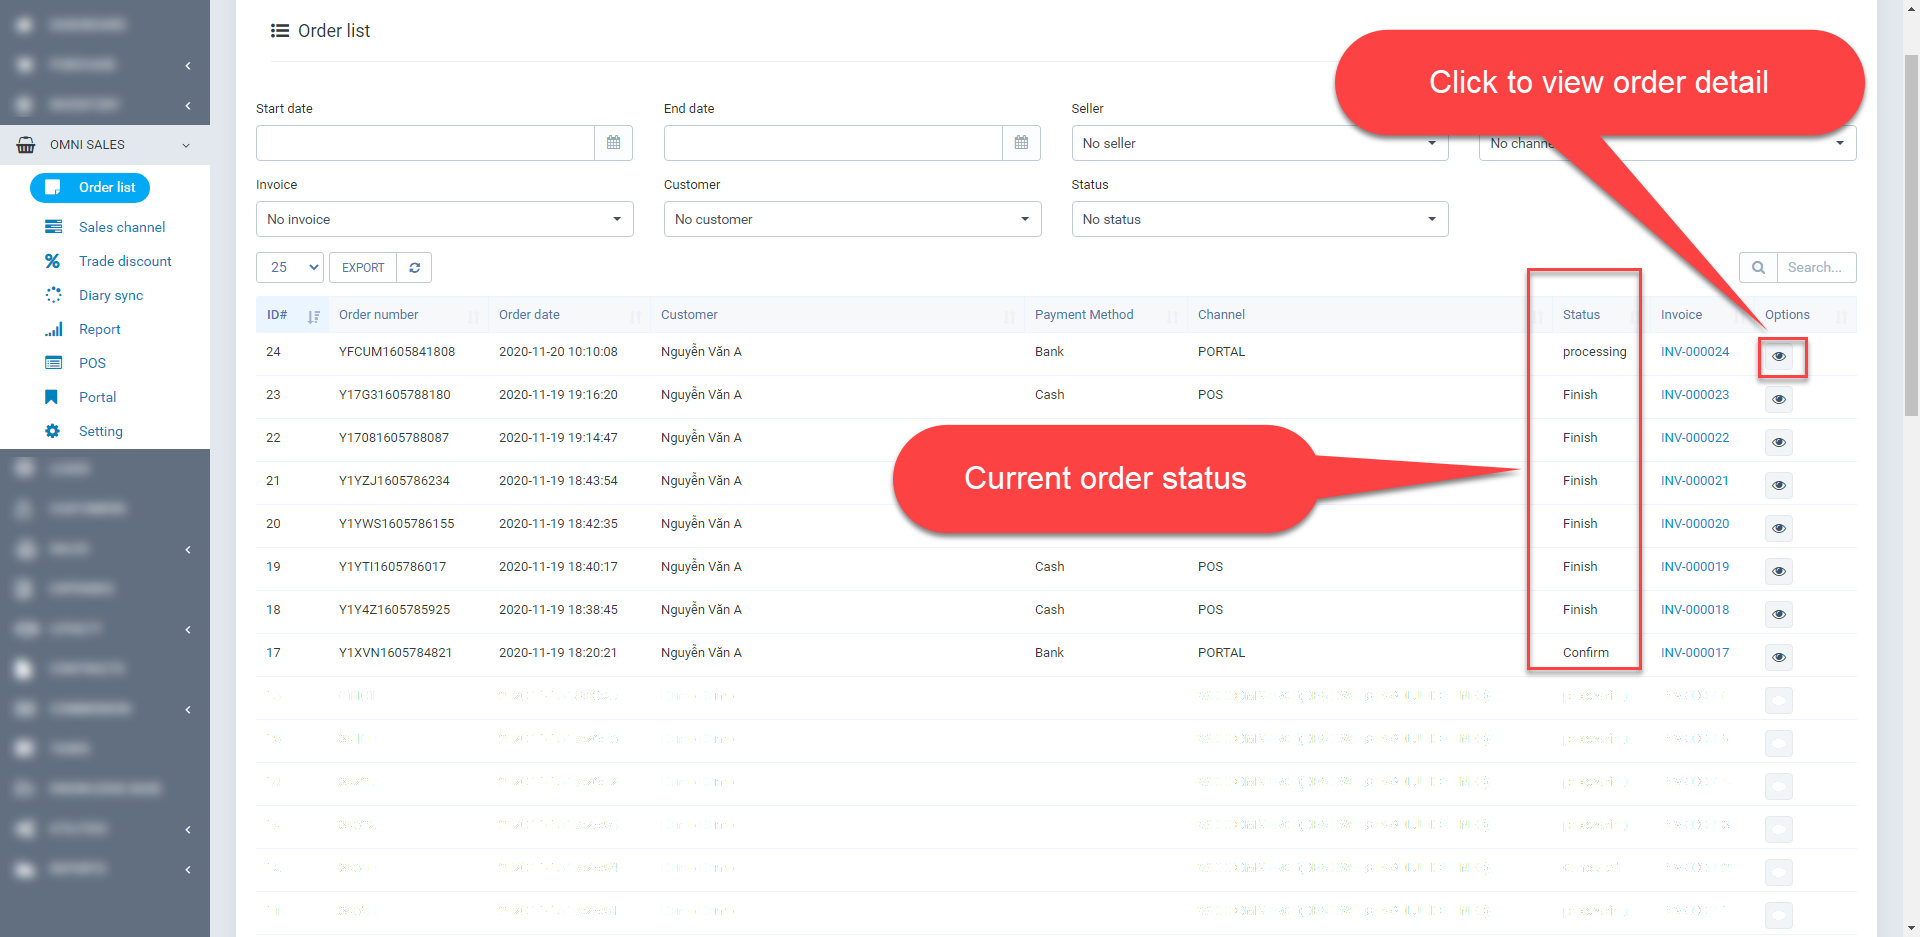
-To change order status please click button in the top right of order, it will show menu with many status. Please you select a status to change. Click create export stock if the items in the order are export stock.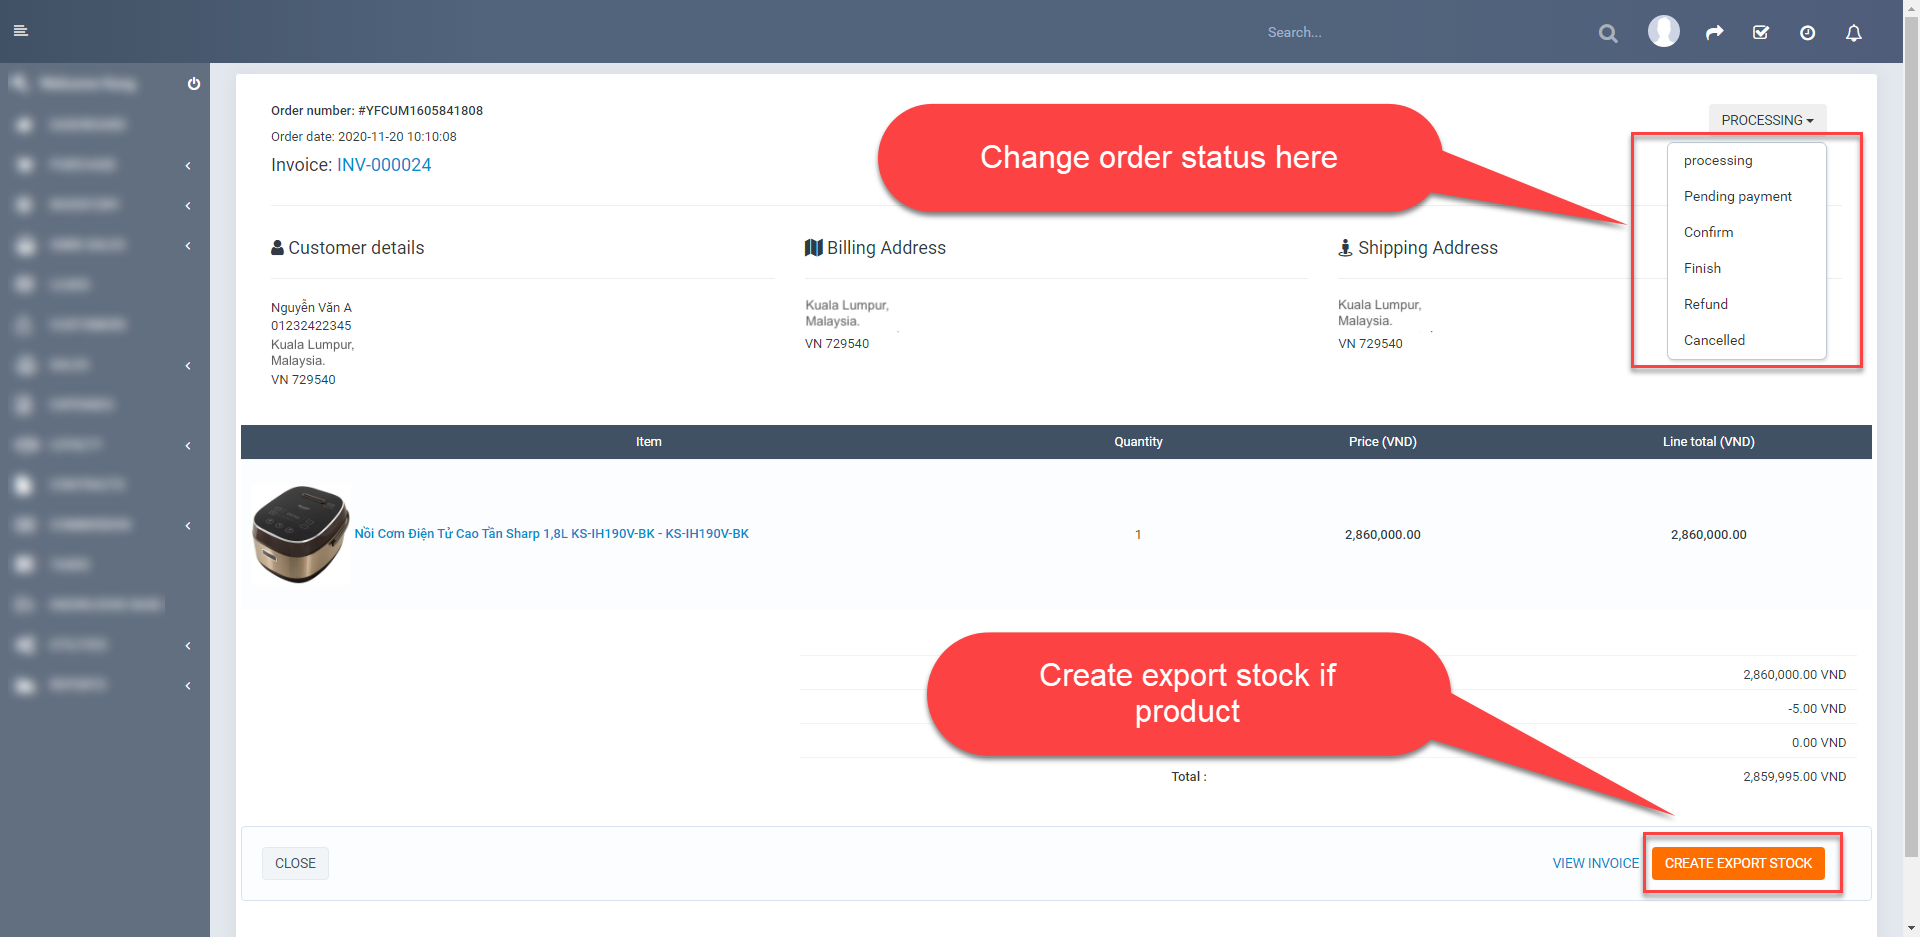
III. Trade discount
- Create trade discount
-Click Trade discount in left menu to redirect to trade discount management page.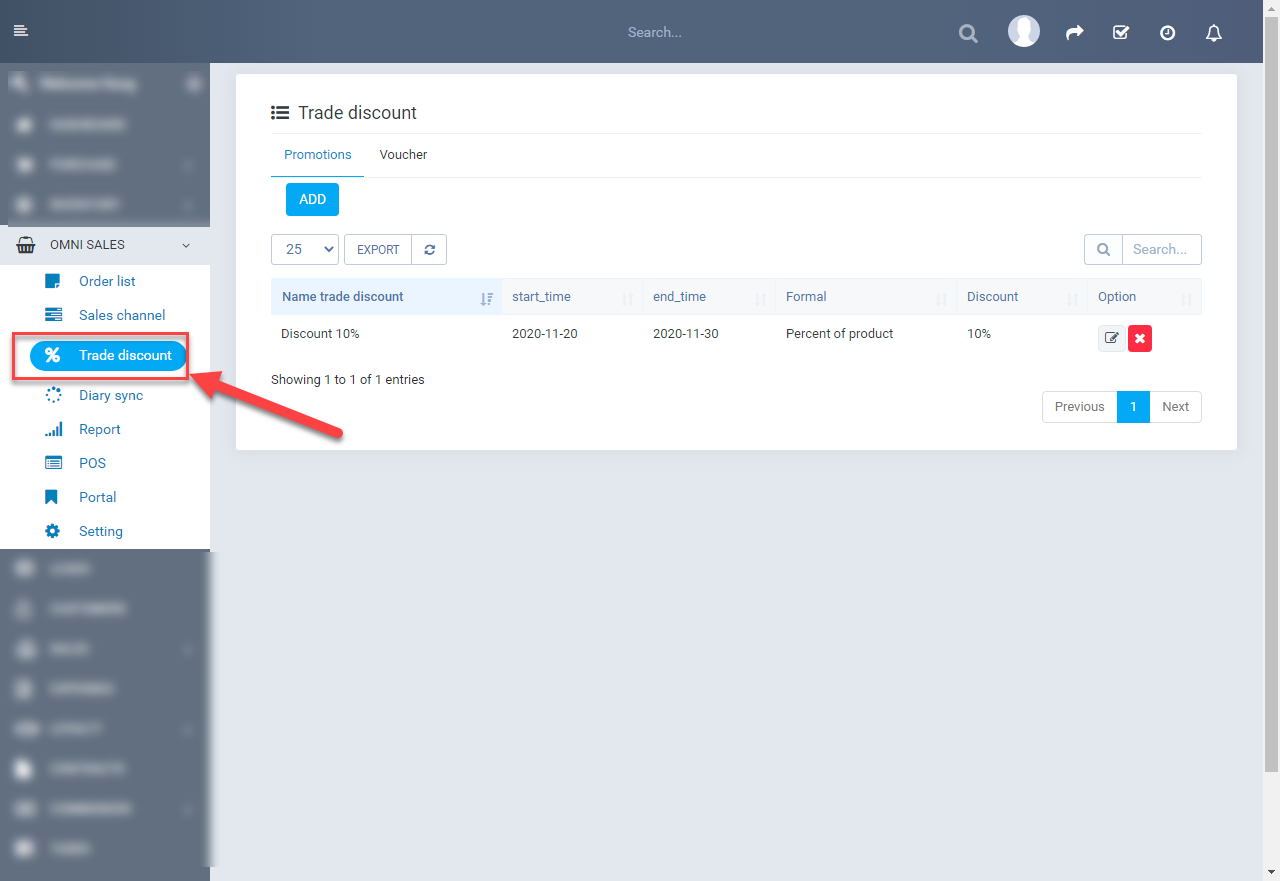
-In Promotions tab, click Add button to redirect.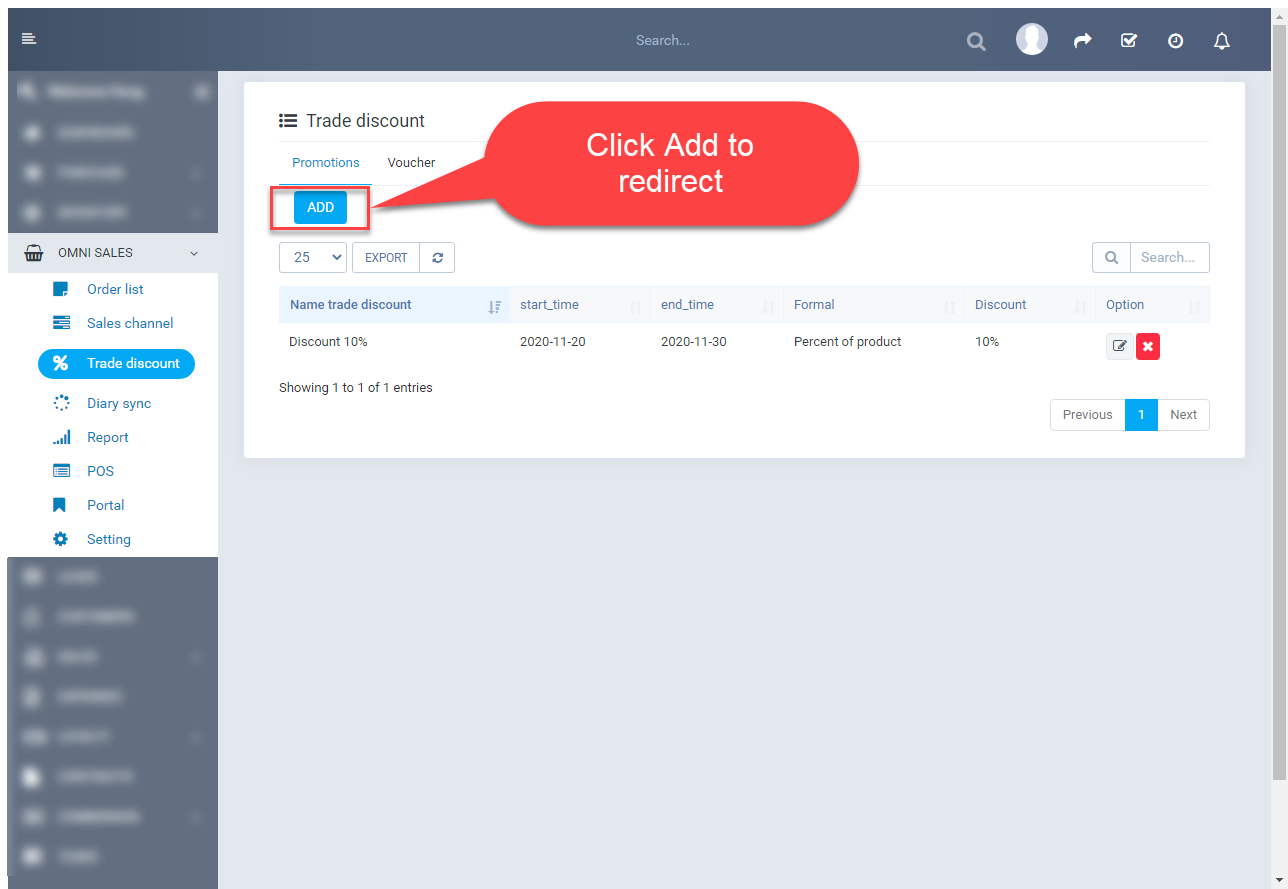
-Enter Name trade discount, select time apply in Start time and End time field, select subjects of application (Group clients, Group items, Items), select reduced form (Percent of product or Price), enter discount value, select Channel and Save to create.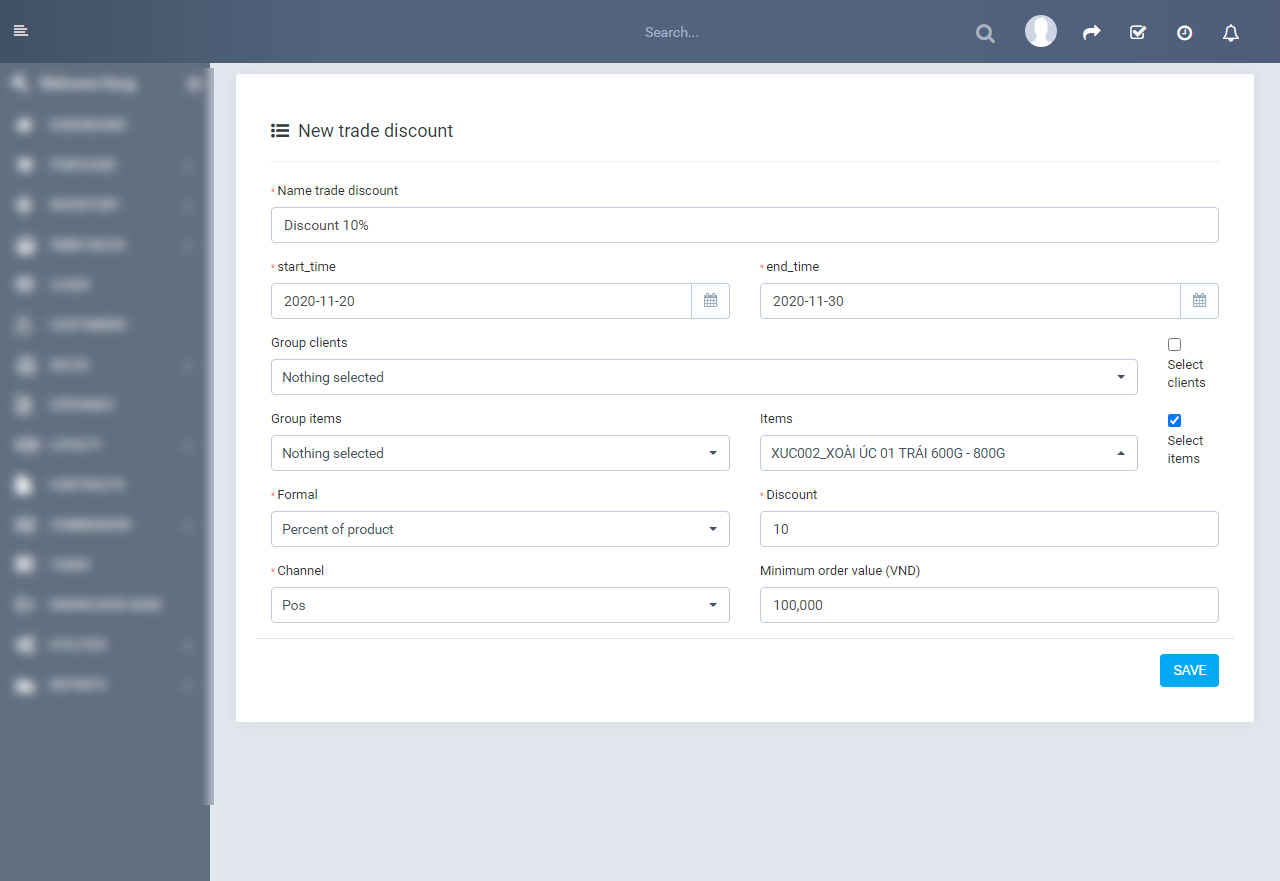
-Trade discount was applied. Portal also similar.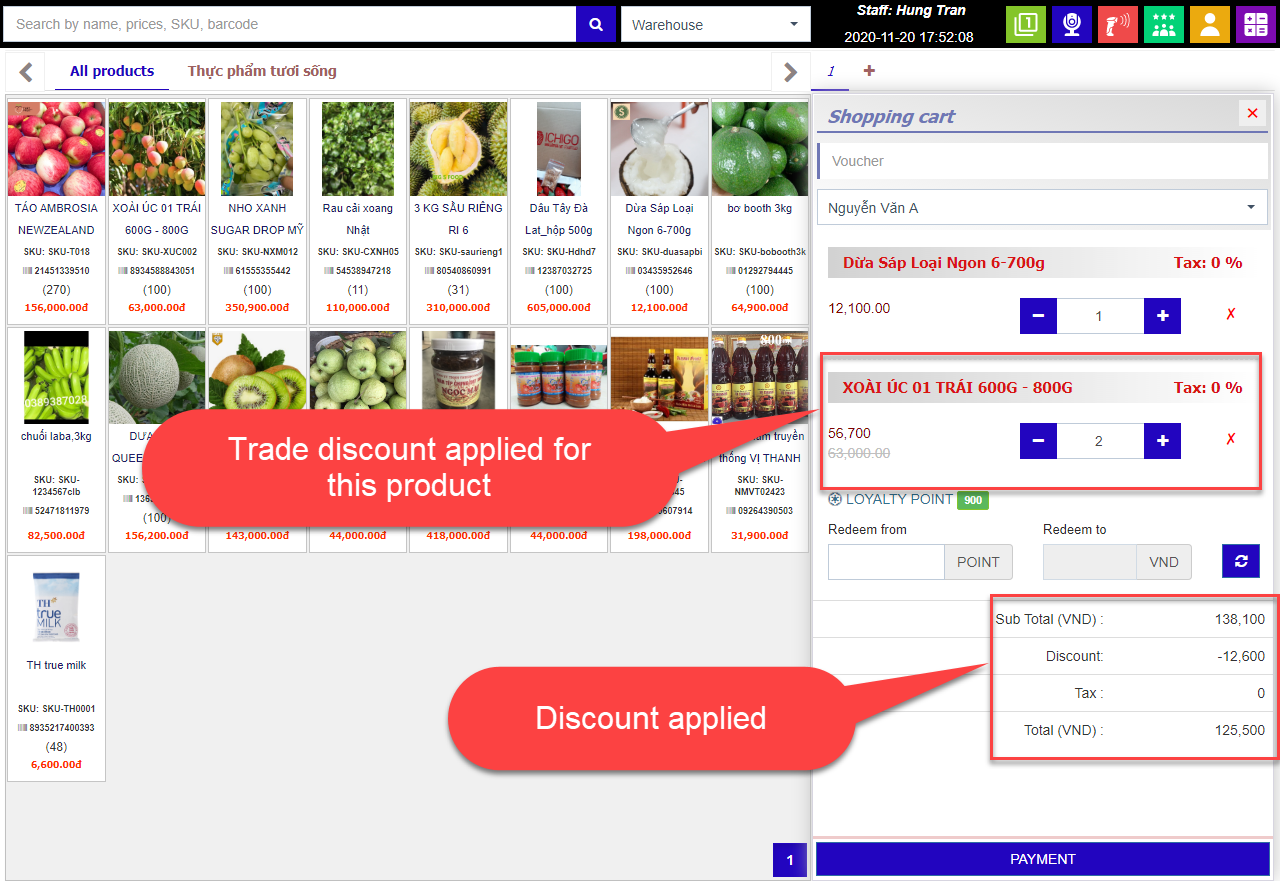
- Create voucher
-Click Trade discount in left menu to redirect to trade discount management page.
-In Voucher tab, click Add button to redirect.
-Enter program name in Name field, select time apply in Start time and End time field, select subjects of application (Group clients), select reduced form (Coupon (Reduced by percent) or Voucher (Reduced by amount)), enter discount value, select Channel and Save to create.
-Voucher was applied. POS also similar.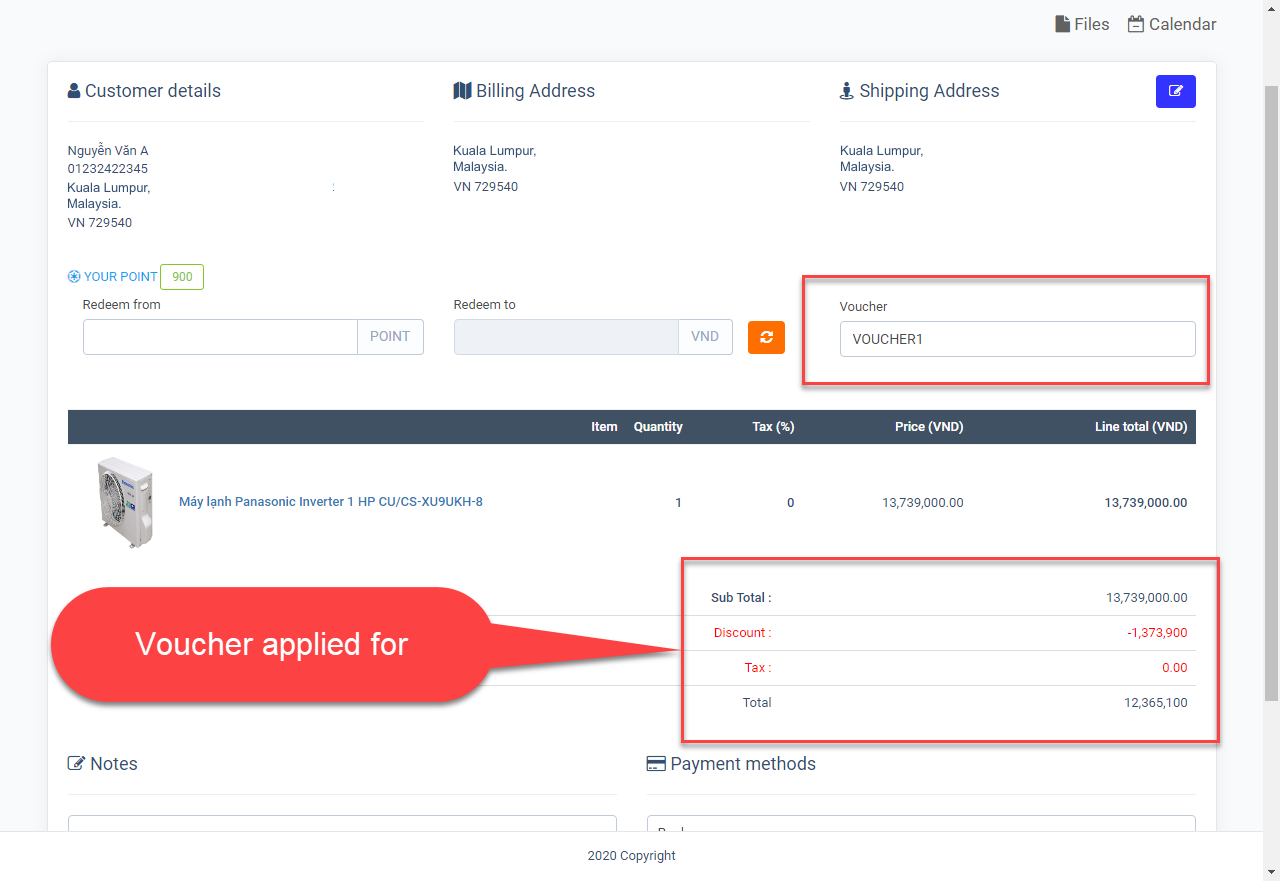
IV. How to use Omni-sales WOOCOMMERCE
- Add new channel woocommerce
 Fill out the information in the fields to create a new channel


- Add product and Sync from CRM to WOO
After you have added new products → sync all infomation or sync product (no image) → if you use the sync product function (no image) you should sync images, sync inventory, sync long desctiptions or you can also sync all infomation to → this will keep your product in full sync.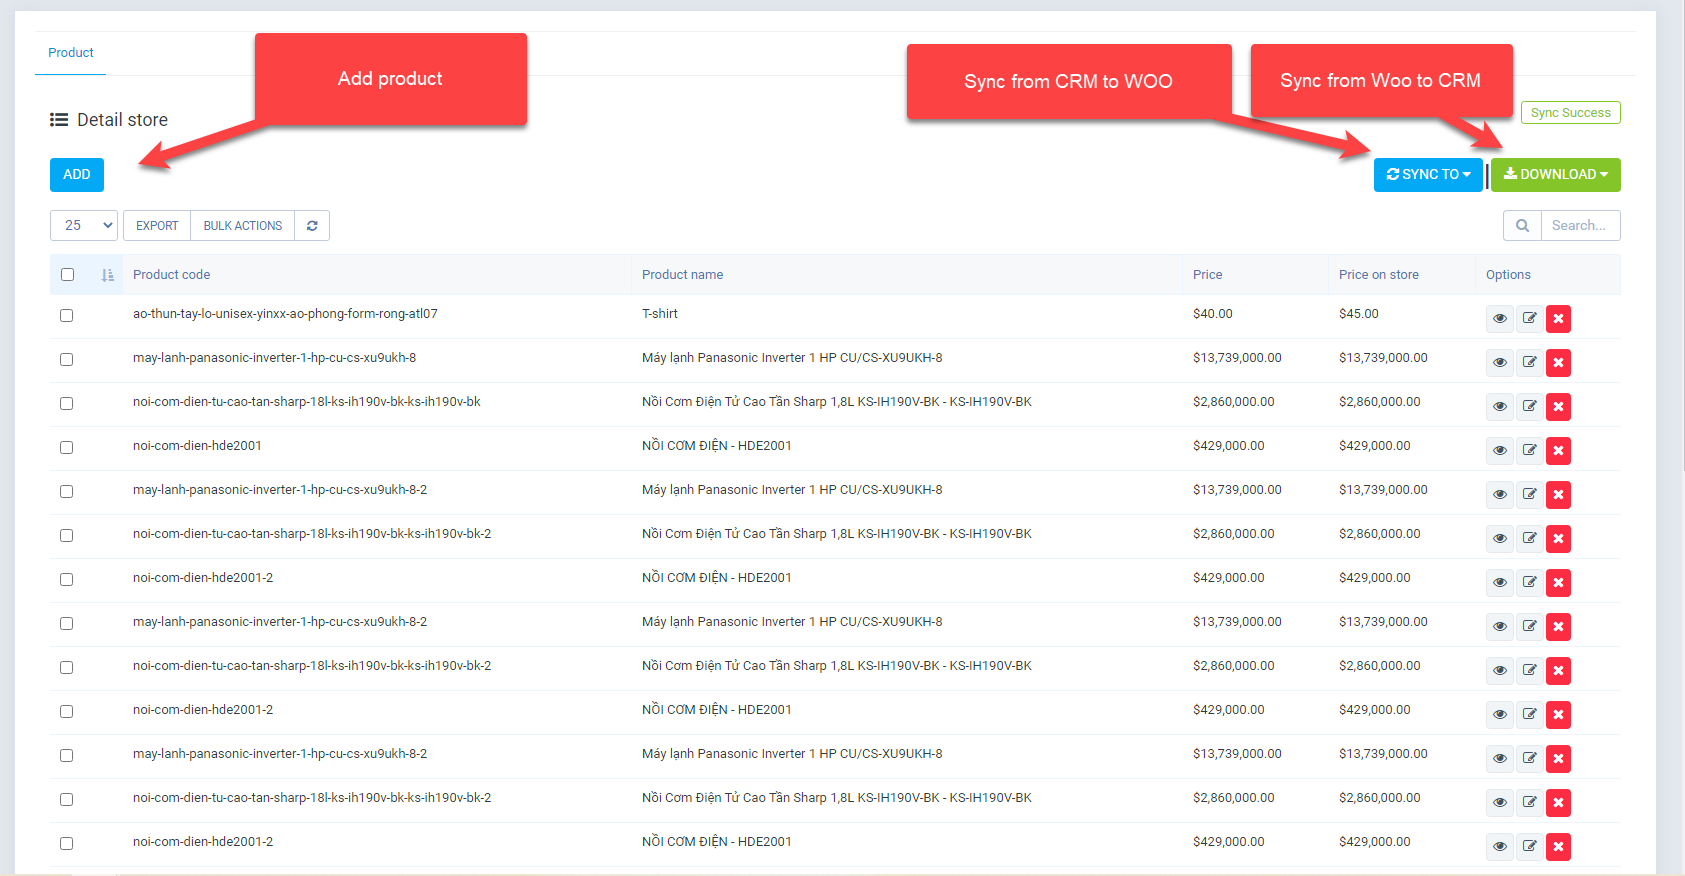
- Step 1: Click Button add


- Step 2: After adding the product, click the sync to button to sync the product on the Website

- Step 3: perform these features at a time if you want to use them
- First feature synchronizes products without images
 ⇒ This feature helps you synchronize your website faster because it does not contain images
- The second feature synchronizes inventory
 ⇒ This feature helps you synchronize inventory as you use it
- The third feature sync prices
 ⇒ TThis feature helps you to synchronize the price of the product
- The fourth feature synchronizes images
 ⇒ This feature helps you synchronize images to your website
- The fifth feature synchronizes long dectiptions
 ⇒ This feature syncs long desciptions
- The six feature synchronizes all information
 ⇒ This feature helps you synchronize all information including photos, stock, prices, description….
- First feature synchronizes products without images
- Step 1: Click Button add
- Sync from WOO to CRM
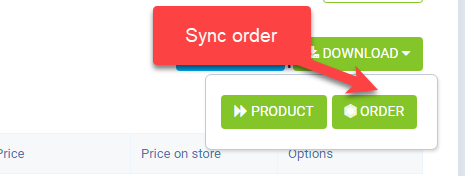
- Step 1: Click button DOWNLOAD
- Step 2: perform these features if you want to use them
- The first feature synchronizes products from your website to the CRM system
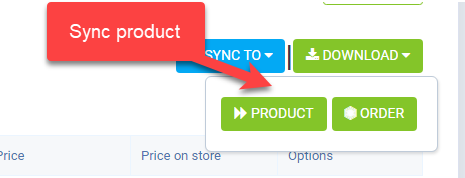
- The second feature synchronizes orders from the website to the CRM system
- The first feature synchronizes products from your website to the CRM system
- Step 1: Click button DOWNLOAD
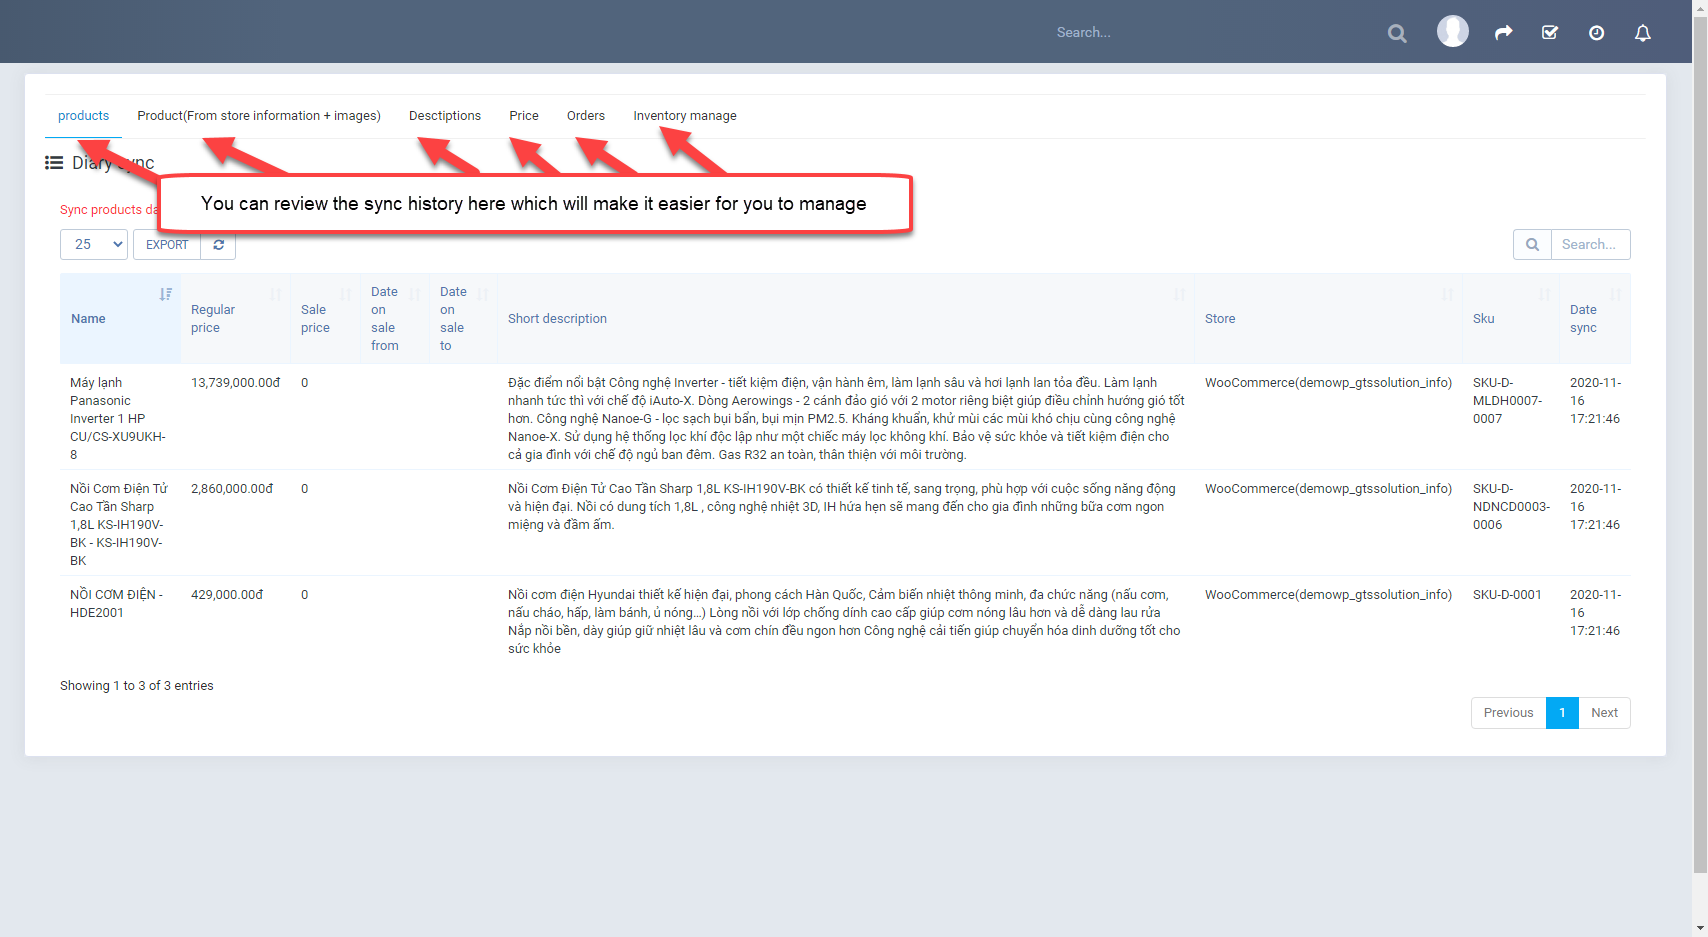
- Diary sync
- Setting
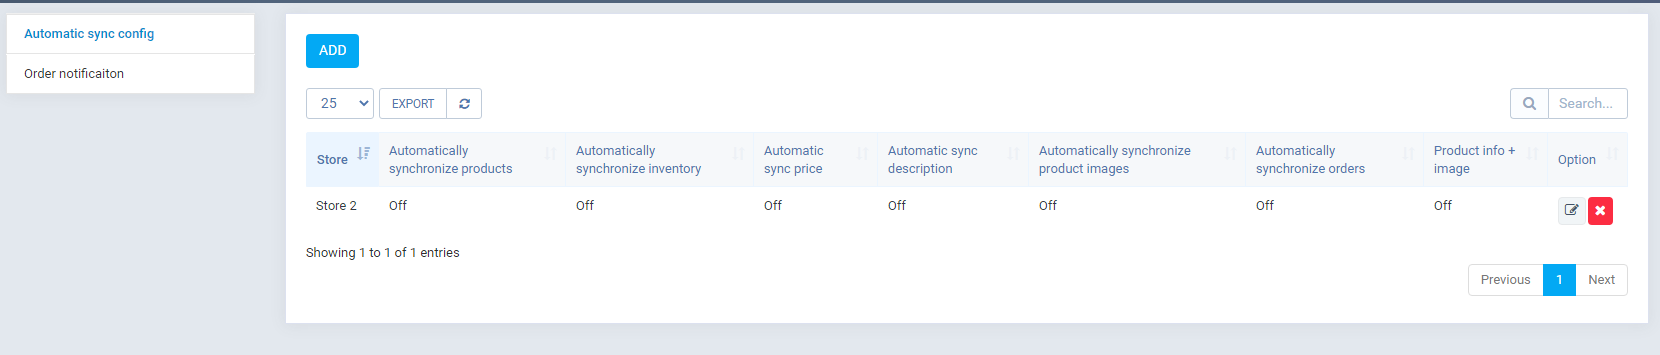
- Automatic sync config

- Order notification

- Automatic sync config
Once again, thank you so much for subscribing this module. We will be glad to help you if you have any questions relating to this module.
Applify Technologies